Nail overlay on natural nails makes them really shine. It reinforces the nails and creates a perfectly smooth finish with an ideal highlight. You can use an acrylic, polygel, or gel overlay on its own, or under gel nail polish.
Creating a nail overlay or overlay nails is laying material normally used for making nail extensions over your entire nail plate.
But without going beyond the free edge.
Whereas nail extensions always extend beyond the free edge.
No tips or forms are needed in the creation of overlay nails.
The best materials for creating nail overlays are polygels, acrylics, dip powders, hard gels, and rubber base gels.
Hard gels and acrylic powders can also be used in some cases.
Types of overlay nails
Polygel nail overlay
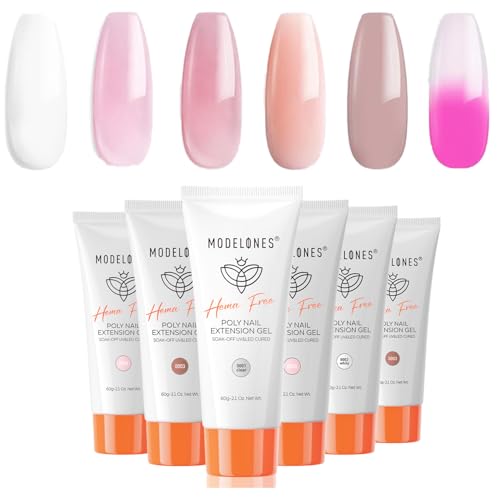
Modelones Polygel Kit
Polygel is a new and innovative material for creating nail extensions that you can also use for nail overlays.
Today, this new material is probably the most popular product for creating nail overlays.
Polygel is a gel/acrylic hybrid. It’s less runny than gel and you usually apply it like acrylics but it only hardens under a UV/LED lamp, just like gel.
Even though polygel is not runny it still does self-level slightly.
One of the best features of polygel is that you can create a smooth and nearly ideal coating only by moving and sculpting the material with a brush dipped in rubbing alcohol.
So you won’t have to file it too much after it hardens.
Polygel is not too adhesive on its own. So make sure you wear a good quality base coat underneath the polygel layer. That would be enough to firmly stick it to your nails.
Polygel application process is similar to the way acrylic nails are done.
After you prepare the nails and cure the base coat, place a bead of polygel in the middle of your nail with a special picker tool.
After that, carefully distribute the product over the nail with an acrylic brush in light tapping motions.
And smooth it out with stroking motions.
The product should completely taper off near the cuticles, near the side edges of the nail, and at the tip of the nail.
Push the excess product over the free edge and remove it with the brush
Make sure you don’t have any polygel hanging over your free edge or getting under the free edge.
Remove it all with the brush before you cure it or file it off and pick it out from the area behind your nail after the material hardens (you can use a nail drill for that). Otherwise, your manicure will chip or come off at the tip.
You can buff the polygel overlay lightly if it’s not smooth enough.
Even though polygel is easy to apply, it’s not as easy to remove as gel nail polish. Polygel won’t soak off. You need to file it off like hard gels.
This kit that comes in a pretty gift box has everything you need for creating polygel overlays and extensions.
There are 6 polygels including a white one for painting French manicure tips, and a temperature-changing one, along with a nail file, a spatula+brush tool, a slip solution, two kinds of dual forms, and two glitters.
Several polygels in this kit have lovely milky pink and neutral colors. So they look gorgeous on their own, even without any gel polish.
Nail drill is useful for filing some parts of nail overlays more precisely and carefully than an ordinary nail file. It’s especially useful for filing the slope near the cuticles and for picking the material from under the free edge.
It’s also useful for removing polygel, gel, and acrylic overlays.
MelodySusie Professional Portable Nail Drill

MelodySusie nail drill is a beginner and budget-friendly but at the same time professional-grade e-file for at-home users.
It has several speeds for working both on natural nails on low and on artificial nails on high. And it’s powerful enough to work with acrylics.
And it’s very compact, lightweight, portable, and rechargeable. So you can take it with you anywhere and do your nails while traveling.
SUNUV 48W UV LED Nail Lamp

SUNUV 48W lamp is easy to use and powerful enough for curing any type of LED gel nail polish quickly.
It also has a low power setting for gently curing base coats and rubber base gels without causing a burning sensation.
Acrylic overlay nails
Mia Secret Acrylic Nail Kit

Acrylics have been used for creating nail extensions for decades.
They can also be used for making acrylic overlay nails.
An acrylic overlay is the most durable one.
Acrylics overlay nails and extensions are done by dipping a nail brush in monomer and picking up a bit of acrylic powder.
The monomer binds the acrylic powder and creates a sturdy material that attaches to the natural nail.
Unlike gel-based materials and polygels that harden only under a UV or an LED lamp, acrylics simply air dry.
So it can be tricky for a beginner to form a perfect acrylic extension or an overlay before the acrylic material becomes hard and difficult to move around.
As with all overlays, first, you need to start with the dehydrator, primer, most of the time you won’t even need a base coat, since it’s not a gel-based product.
Dip your acrylic brush in monomer and wipe the excess monomer off. Dip it into the acrylic powder and pick a pea-sized bead of acrylic.
Place the acrylic material in the middle of the nail with the brush and distribute it over the nail plate towards the free edge in light tapping and wiping motions.
However, don’t sweep too much acrylic material towards the free edge.
Again, the product should taper off near the cuticles, sides, and the tip of the nail.
After that, add another small portion of the acrylic material closer to the cuticles.
It’s needed to reinforce the stress area in the middle of the nail plate and to create a nice natural-looking apex curve.
Distribute this bit of product carefully too.
Add just a bit of acrylic at a time. Don’t use too much product.
It’s always better to add another bead of acrylic than to make your overlay too thick and your nails too bulky.
After the acrylic material hardens you need to buff and file off any excess product to make your overlay perfectly smooth.
A downside of acrylics is that the monomer has a very strong and unpleasant smell.
However, the smell goes away completely after the material has hardened.
And a big plus of acrylics is that, unlike hard gels and polygels, they can get soaked off with acetone.
Mia Secret manufactures a professional clear acrylic powder that offers a great consistency and adhesion. It’s very strong.
This powder also has a special formula that prevents it from yellowing.
This monomer made by Mia Secret works perfectly with their acrylic powders.
The monomer dries quickly, but not too fast. So you have some time to apply your acrylic overlay and to distribute it well.
Dip powder overlay nails
Kiara Sky Dip Powder Essentials Kit

Dip powders are basically acrylic powders that you apply in a different way.
Dip powder kits don’t contain the acrylic monomer but use a glue-type liquid hardening agent instead.
This liquid seals the dip powder and makes dip powder nails air dry and harden.
You don’t need a UV/LED lamp with dip powders.
The biggest advantage of dip powder kits is that they offer an easy and fast way to create acrylic nails.
No need to think about the proper powder to monomer ratio, no need to sculpt the nails with a brush.
You only need to buff the nails, use a dehydrator and primer, use a base coat, and paint your nails with the glue-like liquid.
After that, you need to dip each nail into the jar of the colored dip powder of your choice and brush the excess powder off with a large brush.
Then repeat these steps again: paint the nails with the liquid, dip them one by one into the powder, brush off the excess powder.
The last step is covering the dip powder acrylic overlay nails with a sealing top coat.
After your overlay is done you can apply gel nail polish.
Another advantage of dip powder kits is that the glue-like liquid is much less smelly than the acrylic monomer. So if you are sensitive to smells this is a great alternative to acrylics.
Kiara Sky is a popular manufacturer of dip powders and gel nail polishes with gorgeous effects.
Their Essentials kit contains everything you need to create dip powder nails or overlays.
It includes the bond, the base coat, the top coat, clear powder, several colored powders, nourishing oil, etc.
Acrylic powder overlay nails
Mia Secret Acrylic Powder

You can also create thin acrylic overlay nails without the monomer, just using some acrylic powder.
This overlay is also great to use under gel nail polishes for reinforcement.
If you don’t have a dip powder kit then uncured rubber base coat can act as the binding agent for an ordinary acrylic powder to form a thin overlay on natural nails.
Apply the rubber base gel.
But before you cure it, take a jar of acrylic powder and sprinkle some of it over the nail a few times.
Keep doing it until all the nail is covered in a thin coat of acrylic powder.
Brush off the excess powder from your finger.
Finish the overlay off with another layer of the rubber base coat.
You can use a thin to medium-thick layer of the rubber base gel as the base coat with acrylic powders.
This rubber base gel and acrylic powder combination works in a pretty much the same way as dip powder kits do.
Rubber base gel overlay
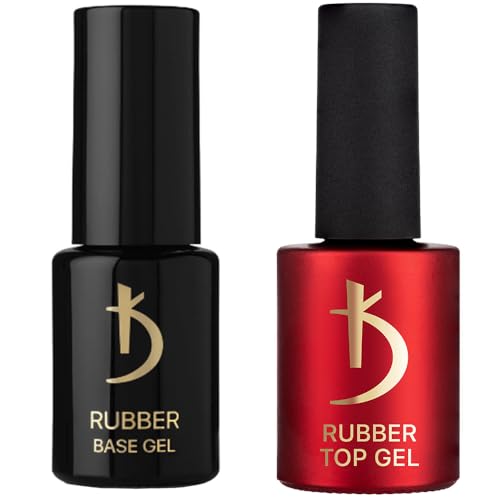
Kodi Rubber Base Coat And Top Coat
Rubber base gel is a new generation kind of base coat.
It’s another popular choice for making nail overlays, even without any gel polish on top.
Because a milky pink or peach camouflage rubber base gel looks really beautiful on its own.
Some people even use rubber base gels for making nail extensions, because they have builder gel qualities.
And they do a great job of smoothing out the nail plate.
However, a rubber base coat may not be as strong and sturdy as other materials, like gels, for reinforcing the nails.
If you are using a rubber base gel under a gel nail polish then you don’t need to apply any other base coat.
Make sure you always use a rubber top coat with your rubber base.
Rubber base coat is a flexible material and pairing it with a hard top coat can result in the cracking of the top coat.
Another big plus of the rubber base gel is that it’s a soak-off material. No need to remove it by filing it off.
There are 2 steps in creating a nail overlay with the rubber base coat.
First, you need to paint a very thin ground layer of the rubber base gel by getting just a tiny bit of product on the brush. Cure this thin coat.
After that, pick a drop of the rubber base coat from the bottle, place it on the nail plate, and distribute the product all over your nail plate.
Start with pushing it a bit towards the cuticles. Then swipe it down to the tip of the nail and cap the free edge.
In the end, turn your hand with the nail facing the floor. So the rubber base coat self-levels with the help of gravity.
You can find a more detailed guide on applying the rubber base coat in my article about rubber base gels.
Kodi is one of the first and most famous brands of rubber gel products.
This set contains both the rubber base coat and the rubber top coat.
The base coat is clear so it has to be used underneath a gel polish layer.
The rubber top coat’s flexibility matches the flexibility of the base coat. So they work together perfectly.
Kodi Camouflage Base Coat
And this milky peach Kodi base coat looks amazing on its own. So you can use it as a pretty coating without any polish.
Hard gel overlay nails
IBD Hard Gel

You may not need a hard gel overlay in most cases, as polygels have taken their place because they are easier to use for creating nail overlays.
However, hard gels are great when it comes to making an overlay for problematic long nails.
That means nails that are too thin, where no gel polish ever stays.
If you have paper-thin nails and you want to wear them long then a gel nail overlay would be the best reinforcing material to go under the gel nail polish or to serve as a standalone nail coating.
Sometimes paper-thin nails can start curling up when they become too long. Hard gels can make them stay straight and will let you wear beautiful long natural nails.
Hard gel is one of the nail industry’s sturdiest materials.
A downside of hard gel is that it doesn’t soak off. That’s why it’s actually called hard. You’ll need to file it off to remove it.
After you have dehydrated the nail plate and applied the primer, apply a thin layer of the base coat, and cure it under the lamp.
You can use a single thin coating of the rubber base gel as the base coat under hard gels for adhesion and reinforcement.
Or you can apply a thin coat of clear hard gel instead of the base coat under your main gel layer.
The next step is picking up a pea-sized portion of a camouflage (non-white colored) gel with the picker tool and placing it in the middle of your natural nail.
Gently distribute the product all over the nail plate in a thin layer, leaving 1 mm near the cuticles and at the sides.
That way the gel won’t come in contact with the skin.
If you have thin nails and they tend to curl up you can leave a bit more material on the free edge to balance your nails out.
When you are done distributing the product over the nail, cure the gel under the lamp.
As with polygels, you can get a pink, peach, or beige camouflage gel and make a gorgeous nail coating without any polish.
However, unlike polygels that often provide a smooth finish right away, you may need to buff gel overlays to get rid of any bumps and ridges that the hard gel may form.
Even if you don’t see them right away, they may become visible after you apply the gel nail polish.
And it’s a downside, as filing and buffing require some extra effort.
IBD is one of the nail industry’s oldest manufacturers of gel products.
Their hard gel is a salon-level material loved by professionals all over the world. It’s strong and stays on very well.

What are overlay nails?
Nail extensions are needed for making your nails look much longer than they really are.
Whereas overlay nails are used for:
- Making the nail plate look smoother by filling all the dents;
- Supporting and reinforcing the nail plate, preventing nail breakage;
- Making the nails look thicker if they are too thin;
- Extending the longevity of your gel manicure;
- Helping thin and weak natural nails prone to breaking grow out without damage by providing a protective coating;
You can use an overlay for reinforcement under your gel nail polish or instead of nail polish as a pretty natural-looking coating for the nails.
If you want to only use an overlay, without any gel nail polish then a camouflage polygel or a camouflage rubber base coat in pink, peach, or beige, with or without shimmer, would be the best choice for this kind of manicure. Your nails will look really glossy and elegant.
An overlay may make your nails look thicker but it will never make them look longer.
A nail overlay is really helpful if you have very thin or bad-looking natural nails.
For example, if your nails have noticeable bumps and ridges.
And an overlay really helps to prevent the breakage of your nails and can improve the longevity of your gel manicure dramatically.
However, sometimes a nail overlay may add a bit of bulk to already strong and thick nails.
The overlay has a cosmetic and protective effect and doesn’t provide nourishment to your nails.
By the way, a nail overlay on natural nails is very useful against nail biting, as it really protects natural nails from teeth.
Benefits of overlay nails
If you’re still unsure whether you need a nail overlay or if you’re wondering what a nail overlay is needed for then I’ll try to explain its benefits to you.
Let’s dive right in!
1. A nail overlay prevents your nails from breaking
Overlay nails cover your natural nail plate with a strong, solid, and durable material.
This material is difficult to break.
Yes, extension nails do break occasionally if they aren’t done properly or aren’t cared for well.
However, the shorter the artificial nails are the stronger they are.
And the length of your natural nails covered with an overlay offers amazing strength.
The apex curve that you create when doing your overlay nails makes this structure even stronger.
No need to be afraid of breaking your nails when they are covered with an overlay material.
A nail overlay also lets you grow your natural nails out without damage while they are shielded by artificial material.
2. Overlay nails make your gel nail polish stay longer
Gel nail polish sticks to artificial material much better than to the natural nail plate.
You don’t even need to use a base coat on top of the nail overlay under the gel polish (you may need to use the base coat under the overlay though to help it adhere to your nails).
A nail overlay is solid while your natural nails may bend a bit.
This makes the polish crack and lift off the nails too soon.
There will be no lifting or cracking because a nail overlay makes your nail plate stay fixed and prevents bending.
3. A nail overlay lets you use gel nail polish on thin and frail nails
Many people who have very thin and frail natural nails complain that no gel polish or even regular nail polish ever stays on them.
The reason is that thin nail plates are very bendy.
Again, gel nail polish can crack, chip, and peel off in chunks when your nails bend.
A nail overlay is solid and it doesn’t bend.
So this layer adds a lot of strength to your natural nails.
Your nails will stop bending under a layer of gel, polygel, or acrylics.
So your polish layer will stay solid and even too.
That’s why creating an overlay on thin and frail natural nails is an absolute must.
This is a lifesaver for your gel manicure on this type of nails.
You’ll see a tremendous difference in the quality and the longevity of your gel polish coating.
So you’ll finally be able to wear gel nails for 2-3 weeks with no chipping, peeling, or lifting.
4. A nail overlay lets you use gel nail polish on peeling and brittle nails
People with brittle and peeling nails face the same problems as those who have thin and frail nails.
No polish ever stays.
A nail overlay helps to seal their nails under a layer of strong artificial material.
This temporarily stops the peeling and crumbling of the natural nail plate and lets gel nail polish stay on your nails longer.
However, this doesn’t eliminate the problem.
You’ll need to find out the root cause of these issues and work on it.
For example, you can try a nail treatment, use cuticle oil for extra nourishment, and take vitamins.
5. A nail overlay lets you use gel nail polish on very short nails
The problem with using gel polish on very short nails is that it chips very quickly.
Many nail techs use a special trick to prevent chipping.
They seal the end of the free edge by running the polish brush over it going a bit under the free edge.
Normally, you don’t need to seal the free edge when doing gel nails. But if your nails chip easily this can help to prevent chipping.
You need to seal the free edge every time you’re applying a polish layer, including the base coat and top coat.
However, with short nails, you don’t even have a free edge, to begin with.
And if you run the brush over the end of the nail you’ll just stain the skin.
But if you apply a nail overlay it helps the polish stay on better and prevents chipping.
So there’s no need to seal the free edge at all.
That’s why you should try a nail overlay on short natural nails.
It really does make a huge difference.
6. A nail overlay covers all the defects and ridges of your nail plate and improves its curve
One of the main purposes of a nail overlay is to cover all the imperfections of your natural nail plate.
The overlay layer masks all the bumps and ridges and fills any dips that your natural nails may have.
In addition to that, a nail overlay can change your nail plate’s curve and improve its look.
For example, your nails can curve downward like claws or face upward. This doesn’t look too pretty.
The use of artificial material in a proper way can compensate for the natural curve of the nails and make them look perfect.
No more clubbing nails!
7. A nail overlay lets you create an ideal highlight and gives you perfectly smooth coverage
Not only will the overlay cover all the defects, bumps, ridges, and imperfections of your nail plate, it will also let you create a perfectly smooth nail surface.
You can achieve smoothness by using a self-leveling builder gel as the nail overlay material or by smoothing your acrylic or polygel overlay with a brush.
Dip powder overlay also goes on very smoothly.
Of course, you’ll need to buff the surface for perfection after the material sets.
A smooth nail surface is great for gel polish application.
The polish will go on much easier.
You’ll be able to get good coverage with no streaks or bubbles.
If you use a matte top coat your nails will look smooth and velvety.
Plus, a smooth nail surface is super-important if you’re using a high-gloss top coat.
It will let you achieve perfect highlights on your glossy nails.
If you want to take photos of your nails they will look amazing with ideal highlights.
You’ll also need to create perfect highlights if you’re doing nails for a client and need photos for your portfolio or your Instagram page.
Trust me, your nails will look stunning!
Everyone around you will be wondering how you managed to achieve this amazing look.
8. A nail overlay lets you remove gel nail polish in a safer way
A nail overlay is great if you or your nail tech prefer to remove gel nail polish with a nail drill before applying a new color.
You may want to use a nail drill if you don’t like the impact that acetone has on your nails.
The overlay creates a safety layer between your natural nail plate and the color layer.
You don’t need to remove the overlay layer to repaint your nails.
So when you’re removing the color layer with an E-file there’s a low risk of damaging the natural nail plate with the drill’s bit.
If you accidentally dig in too deep with the drill you can only take off a bit of the overlay instead of cutting into your natural nail.
That’s why a nail overlay is great if you’re just learning to use a nail drill.
In addition to that, your nails won’t get thinner with every polish removal procedure.
And if you want to get rid of the overlay easily later on use an acrylic overlay. It can be soaked off with acetone.
Builder gels and polygels need to be removed with a nail drill.
Nail overlay vs nail extensions
As I’ve already said above, the main difference between a nail overlay and nail extensions is that the overlay only covers the natural nail, and extensions extend over the free edge.
Extensions are made with tips that are glued to the nail or with forms that serve as the base for the added material.
Again, a nail overlay requires the same materials as nail extensions, but the application process is a bit different.
Just like extensions, overlays are spread over the nail with a sculpting brush, and a reinforcing apex curve is formed.
Nail overlay vs gel nail polish
Gel nail polish only provides the color coating of the nails.
While a nail overlay is not only about the color.
A nail overlay is often used together with gel nail polish as an additional layer under the polish to strengthen the nail and to smooth out all the dents and ridges in the nail plate.
This will help you get a perfect glossy or matte gel manicure surface in the end.
So when you are doing a gel manicure you can add an extra step of creating an overlay before you apply the gel nail polish.
You can create all kinds of nail designs on overlay nails, just like you do on natural nails or extensions.
You can also finish your nail overlay with colored acrylics instead of gel nail polish. Or, for example, leave pink or beige polygel as a nude nail color coat.
Overlay nails vs infills
An infill is when you only fill in the naked part of the natural nail between the cuticles and the nail extension or the area covered with gel nail polish.
This gap appears as your nails naturally grow out with time.
Nails grow pretty quickly so your manicure will start looking weird in a few weeks.
Your design will get pushed downwards.
So the grown out part of the bare nail must be covered with an extension material and connected to the old extension seamlessly.
And doing an infill is much easier and cheaper than re-creating extensions. Plus you may want to keep a certain beautiful design.
So many people don’t remove their extensions for long periods of time and only do infills regularly.
Thin free edge
One of the most important things you need to keep in mind is that normally you shouldn’t add extra material to the free edge or make the free edge of the overlay thick.
If you pile a lot of material onto the free edge your nails may break.
The free edge should be the thinnest part of your nail overlay unless you are adding extra material to counterbalance thin nails that tend to curl up.
Thickest point
The thickest point of your overlay should be in the middle of your natural nail bed lengthwise (natural nail plate length from the cuticles minus the free edge).
This is the stress zone of the nail that you need to reinforce to prevent breakage.
Leave a bit more material in the stress zone and form a slight natural-looking curve tapering off at the free edge, the side edges, and near the cuticles.
Nail prep
You need to prepare your nails before you make any kind of overlay.
This is necessary to ensure the maximum adhesion and to make your overlay stay longer, as good preparation prevents lifting.
The first steps are pushing back the cuticles with a pusher or an orange wood stick and lightly buffing off the shine from the natural nail plate.
Cleanse your natural nails with a special cleanser or 99% Isopropyl Alcohol using a lint-free wipe.
Next, use a dehydrator to de-oil the nail plate and remove any moisture.
After that, apply a non-acid or acid-free primer to the entire nail plate or to the tip and sides of the nail without touching the skin.
The primer acts as double-sided scotch tape and bonds the overlay to the nail.
Mia Secret Dehydrator And Primer

Mia Secret makes a good dehydrator and acid-free primer set that is very effective and safe for the natural nail plate and works both with acrylics and gel-based materials.
Then you can start making your overlay.
You don’t need any tips or forms for creating an overlay on natural nails.
Have fun creating gorgeous gel, polygel, dip powder, rubber base gel, or acrylic overlay nails!
Recommended reading:
Best Professional Gel Nail Polish Brands Used In Salons
Best Gel Base And Top Coat: The Updated List Of The Best Gel Nail Base And Top Coat Sets
Kiara Sky Gel Polish: Full Review And Buying Guide
Best No Wipe Gel Top Coat: An Honest Review Of 12 Best No Wipe Top Coat Gel Brands
Non-Toxic Gel Nail Polish Brands 101: Choose The Safest Gel Nail Polish
Most Popular Shellac Colors – The Ultimate List Of 15 Best Shellac Colors For Fantastic Manicures
Best Nail Dehydrator And Primer: The Ultimate Guide
Mermaid Gel Nails 101: Best Mermaid Gel Polish And Mermaid Nail Powder
Best No Light Gel Polish — Gel Nail Polish Without UV Light
Best Small Salon Reception Desk: Make An Amazing First Impression
Why Are My Gel Nails Lifting? 15 Reasons Why Your Gel Polish Is Lifting
10 Best UV and LED Nail Lamp Units For Gorgeous Gel Nails