Almond is probably the most popular and classy nail shape. At the same time, it’s the most difficult nail shape to create.
But don’t fret! Here is my full guide on how to shape almond nails like a pro.
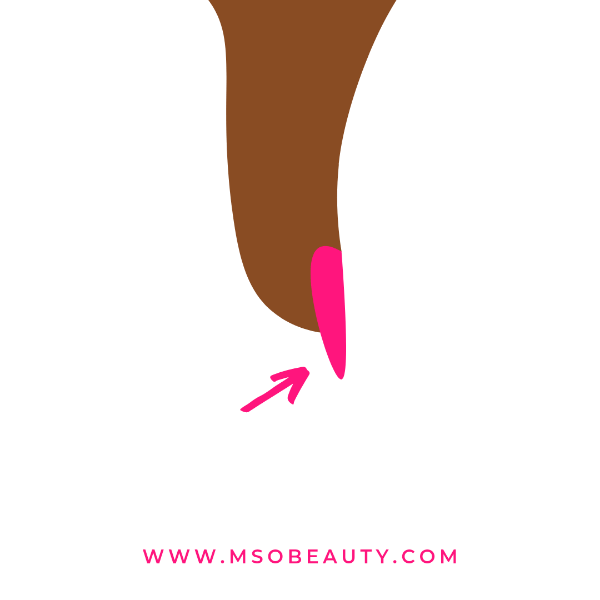
What are almond nails?
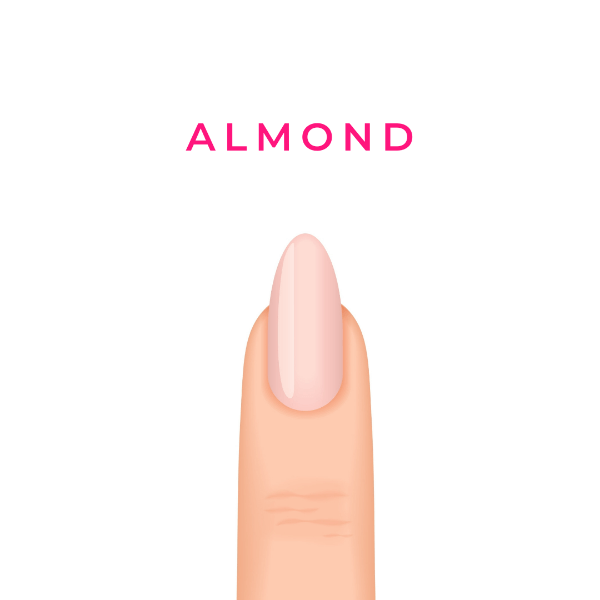
Almond nails are nails shaped like almonds.
They are similar to oval nails but their free edge tapers into a rounded peak and their tips are more narrow.
However, they are not as pointed as stiletto nails.
And they differ from coffin nails where the tip of the free edge is always flat.
Almond nails never have corners.
Almond nail shape is universal and suits anyone.
It looks great on both long and short fingers and instantly makes any hand look slender and beautiful.
Almond nails look best when they are elongated.
The free edge can be up to 3 times as long as the length of the nail from the cuticles to the beginning of the free edge.
Choose the almond shape for your natural nails without enhancements if they are strong enough and if you don’t make your almond nails extra long.
However, some people’s natural nails aren’t strong enough for the long tapered almond shape.
They may break, especially if you have weak and brittle nails.
But the good news is that you can apply nail extensions, such as polygel, acrylics, or gel nails, to create the almond shape.
You can also use a nail overlay to reinforce the natural nail plate.
For example, add a layer of polygel, acrylic powder, or gel before you apply the polish layer.
If your natural nails tend to curve downward when you grow them out you may also need to build almond nail extensions for compensating that downward curve. Use polygel with dual forms for that.
How to shape almond nails
Begin with deciding whether you want to shape natural nails or nail extensions.
The tools and the technique you’ll need to use will depend on the type of nails you’d like to create.
How to shape artificial almond nails and nail overlays
First, you need to build almond nail extensions, and then you can create the final shape using a nail file or a nail drill.
A nail file is easier to handle for less experienced people because a nail drill can quickly file off too much material.
Still, you may need a nail drill to get the excess extension material from under the tips of the nails that builds up there
when you use dual forms.
Building almond nail extensions
The simplest way to build artificial almond nails is by using polygel with dual forms.
Polygel is easy to file and very easy to use.
Gershion Polygel Nail Kit

Modelones Dual Forms

Dual forms let you create correctly shaped artificial nails with the right apex curve, C-curve, and the correct thickness.
The apex curve is the smooth curve that reinforces your nails in their stress zone. It’s important for the strength of your extensions.
C-curve is the arch of the nail.
With dual forms, nails come out pretty smooth and you won’t need to do too much filing.
Just choose dual forms that are slightly larger than your natural nail plate to leave some space for the extension material.
Also, pick standard dual forms for building almond nails, not the ones with a high curve.
After that, prep your nails by buffing the shine off them, pushing away the cuticles, cleaning the nail plate, and applying dehydrator, primer, and base coat.
Apply some polygel onto the dual form and distribute it over the form.
Use the measurement scales on the form to select the correct length and build the almond shape of the free edge with polygel.
Press the dual forms onto your natural nails, remove the excess material that gets over the edges of the forms.
Then put your hand under the UV/LED nail lamp for 60-90 seconds to cure the polygel extensions.
After pulling the hand out of the lamp pinch the tips of the nails if needed.
SUNUV UV/LED Nail Lamp

After the polygel has cured and you’ve popped off the forms you can begin filing your almond nails to perfection with a nail file.
What length should I choose for my almond nail extensions?
To make your almond nails look beautiful the free edge should never be shorter than the length of the natural nail bed from the cuticles to the free edge.
That way you’ll get a gorgeous long and slender nail shape.
If your nail beds are short and wide the free edges can have the same length as the nail beds. The ratio can be 1:1.
But if you have long and narrow nail beds then you can make your almond nail extensions even longer.
The ratio can be up to 1:3.
If you make your nails longer than that they may break easily. So 1:3 is the maximum ratio that I’d recommend.
What nail file do I need to use to shape almond nail extensions?
Teuki 100/150 Nail Files

Get an emery board nail file.
There are also metal and glass files but I don’t recommend them.
Glass and metal files aren’t strong enough and are heavier to hold. So your hand will get tired faster.
Nail professionals use emery boards.
The shape is a matter of personal preference, but I think the half-moon/semicircle shape is the most ergonomic and convenient one to hold in your hands.
But you can select any shape you like.
What grit should the nail file for shaping artificial almond nails be?
You should use coarser nail files for filing nail extensions than the ones you use on natural nails.
First, use a coarse 80-100 grit nail file for reducing the length of your extensions and for rough shaping.
But don’t use the coarsest file for the entire filing process.
Move on to 150 grit files to add the finishing touches to your nail extensions.
I recommend using Teuki 100/150 semicircle emery board nail files for shaping and perfecting nail extensions.
They have a nice ergonomic shape with the optimum grits for artificial nails on both sides.
Tip:
If you use a new nail file and it has sharp edges file them down a bit with a buffing block. That will make them blunter and they won’t cut your skin.
How to shape artificial almond nails with a nail file step by step?

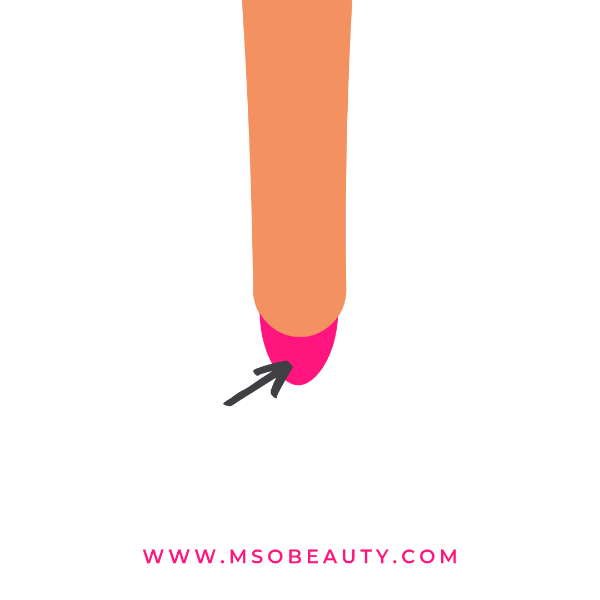
- Begin with removing any excess material. File the nails to the desired length, filing the tip to a rounded shape in the process.
- No need to create a square shape first and then make an almond out of it.

- Your index and ring fingers’ nails should have the same length.
- That means you’ll need to measure the length of each nail plate from the cuticles to the end of the free edge. And make these nails equal in length.
- The thumb and the middle fingers’ nails should be +1-2 mm longer because they have wider nail beds. You need to balance that out visually.
- The middle finger should be the longest because it has the shortest natural nail bed.
- And the nails on your pinkies should be -1-2 mm shorter. They have the narrowest nail beds.
- That way all your nails will look balanced.
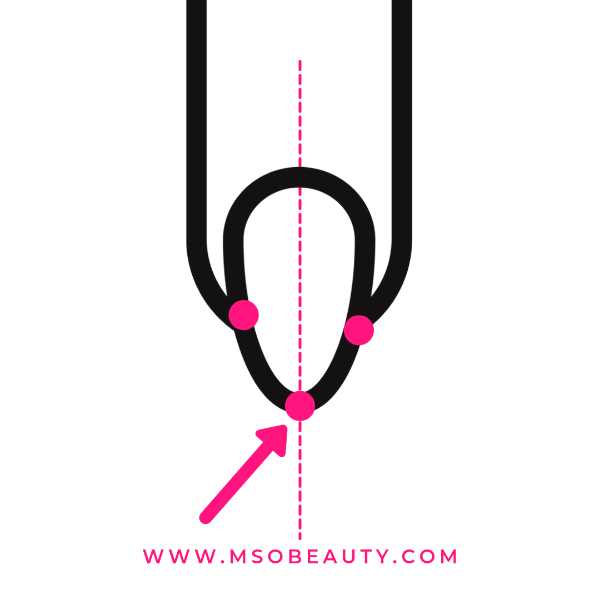
- If you’re having trouble with positioning the endpoint of the tip place it on the central vertical axis of the nail that goes from the cuticle line to the free edge and divides the nail plate in half.
- This will make your nails appear symmetrical.
- If you’ve used dual forms pick any excess material from under the nail’s tip if it got there when you were using dual forms. Use a nail drill with a small conical bit.
MelodySusie Professional Rechargeable Nail Drill

Makartt Nail Drill Bits Set

- File the top surface of your nails from the middle of the nail to the end of the free edge.
- You need to do it to remove any extra polygel/gel/acrylic material, to make the free edge thinner, and to get rid of any bumps and ridges on the surface.
- File the thickness of the free edge down to below 1 mm.
- However, don’t make the free edge too thin in the process.
- Note: if you’ve used dual forms for building your nails this whole step may be unnecessary. The top surface of the nail extensions will come out pretty smooth on its own.

- Shape each sidewall filing from the nail growth point to the tip of the free edge to make them thinner and smoother.
- The body of the nail file must stay on the sidewall perpendicular to the top surface of the nail in the process.
- Nail growth points are the areas where the nail’s free edge leaves the nail bed.
- That’s where the lateral folds (the skin folds on each side of your nail) end and where the free edge begins.
- Don’t overfile the sidewalls and don’t dig into your sidewalls beyond the nail growth points.
- If you file the sidewalls of your nails down too much your extensions will become weak.
- Overfiling the sides and the sidewalls is the most common mistake people make when filing nails and nail extensions.
- File the top surface of the free edge of the nail from the sidewalls to the central axis to connect all the filed surfaces into one smooth shape.
- This step may also be unnecessary with dual forms if the nail comes out smooth.
- Look at your nail from the side to see whether it looks as if it’s bending down like a claw.
- File each side edge of the nail going from each nail growth point down to the tip of the free edge if needed.
- This is necessary to bring the side edges up and your almond nails in line.
- Keep the nail file under the nail while you’re doing it.
- File the side edges moving the emery board in one direction only, to avoid overfiling them.
- Don’t file the side edges of your nail extensions down too much to make the nails look narrower.
- And again don’t dig into the nail growth points. Don’t make notches in them.
- Notches in the growth points can make the nails break easily or even make them detach from the skin.

- Gently file the surface of the nail from the apex of the nail towards the cuticles to make this area smoother and thinner.
- You don’t want a bulky slope there.
- The slope from the apex to the cuticles must be smooth.
- And there should be almost no material left right next to the cuticles.
- Move the file in one direction from the center of the cuticle line towards the nail growth point on one side. Then repeat it on the other side of the nail.
- However, avoid touching your cuticles and skin with the nail file.
- You can use a nail drill instead of a nail file for this step.
- After that, you can buff your nails to perfect smoothness and apply gel nail polish, top coat, or create any design that you like.
- Use the same filing steps when shaping almond nail overlays.
How to shape natural almond nails
Shaping natural almond nails is quicker and easier than building and shaping artificial almond nails and overlays.
What nail file do I need to use to shape natural almond nails?
For natural nails, I recommend getting an emery board file with a 180-200 grit coarseness and a half-moon shape.
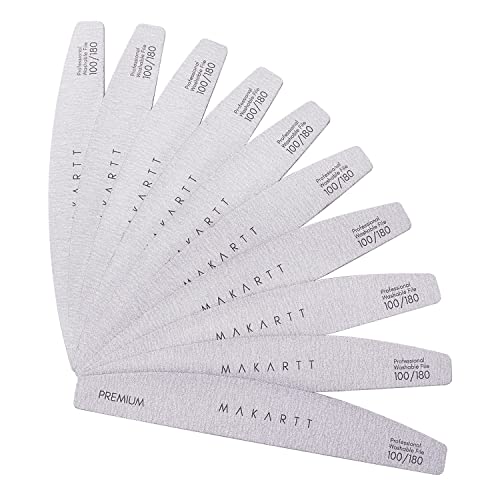
Makartt Zebra 100/180 Nail Files
Metal files are bad for the nail plate and may cause splitting.
In addition to that, metal files are heavier.
Again, professionals prefer emery boards.
And a half-moon shape is the most ergonomic one for holding in your hands.
Nail file grit for shaping natural nails
Get a 180-200 grit nail file. It’s a medium grit that’s safe for natural nails.
It’s great for reducing the length of natural nails and for shaping them.
Any grit lower than that is best for artificial nails and would be too coarse for natural ones.
For example, an 80 grit is very coarse and can only be used on nail extensions.
And a grit higher than 200-240 would require you to spend too much time filing the nails to the shape you want and may cause an unpleasant sensation.
A higher grit should mainly be used for buffing natural nails and for removing the shine off them before gel nail polish application or before building nail extensions.
I recommend using Makartt Zebra 180 nail files for shaping natural almond nails.
How to shape natural almond nails step by step
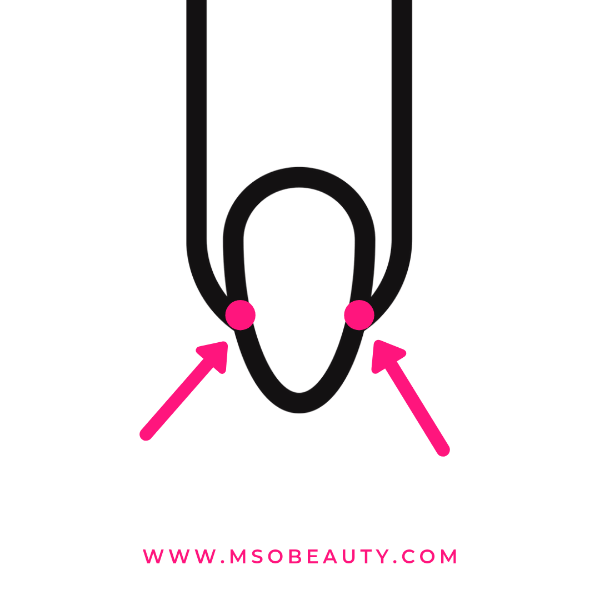
- When filing natural nails make sure you file them only along the smile line from one nail growth point to the other.
- Each nail has two nail growth points.
- These are the points where the nail’s free edge leaves the nail bed.
- Never dig into the nail with the nail file beyond the nail growth points or you will create notches, damage the nail plate, and you can even make it detach from the nail bed at the sides.
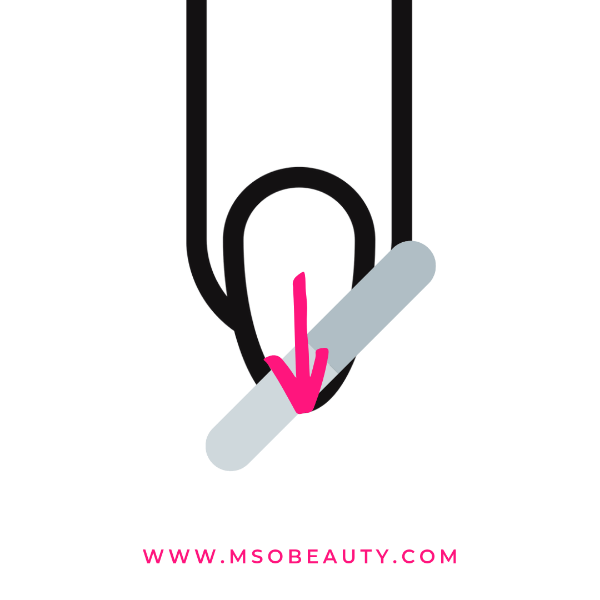
- File one side edge of the nail going from its respective nail growth point down to the tip of the free edge rounding the tip in the process.
- Keep the nail file under the nail plate when doing that.
- If you keep the file over the nail plate you risk to overfile it.
- The middle of the tip should be positioned on the central axis of the nail that goes from the cuticle line to the free edge and divides the nail plate in half.
- Then repeat the filing process on the other side of the nail.
- You should create a smooth curve on each side and these curves should be symmetrical.
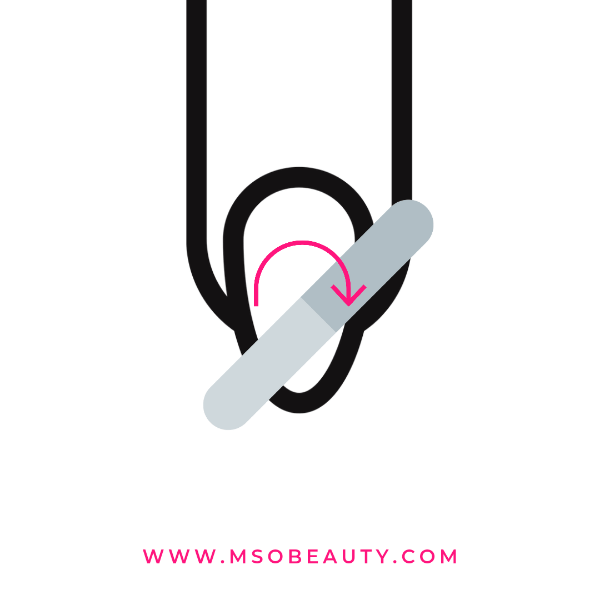
- Make the file go in one direction only.
- Don’t file back and forth in a sawing motion to avoid overfiling the side edges or making the free edge frayed.
- Make your index and ring finger nails the same length.
- That means the length of the entire nail from the cuticles to the tip.
- Make the middle finger and thumb’s nail length +1 or 2 mm longer.
- The pinky nail’s length should be -1 or 2 mm shorter than the index and ring finger nails.
- All your nail plates will look gorgeous and balanced that way.
- To create the correct shape of the side edges you should take a look at the nail from the side.
- The curve from the nail growth point to the tip should be smooth.
- The nails must not curve down like claws.
- Correct the side edges as needed.
- When you’re done shaping the nails you can buff them a bit to add a few finishing touches and to prepare them for nail polish application.
That’s how you shape almond nails.
Recommended reading:
Best Professional Gel Nail Polish Brands Used In Salons
11 Best Nail Files For Natural Nails That’ll Make Nail Shaping Easier
Nail Shapes Chart And Types Of Nail Shapes 2021 — The Ultimate Guide
10 Best Korean Cleansing Balm Products That’ll Probably Be Your New Skincare Secret
15 Best Korean Foam Cleanser Products For All Skin Types
7 Best Magnets For Nail Polish To Help You Create Stunning Cat-Eye Nails
10 Best Nail Polish Pens And Pen Sets To Make Easy Nail Art At Home
14 Best Nude Gel Nail Polish Colors For Every Skin Tone
How To Remove Gel Nail Polish From Acrylic Nails Without Ruining Them: 2 Proven Ways
How To Thicken Nail Polish For Stamping Easily?
Do I Need A Base Coat For Gel Nails? Here’s The Answer!
Do You Need A UV Lamp For Acrylic Nails?
How To Thin Out Nail Polish Like A Pro Nail Tech?
How Long Does A French Manicure Last?
Non-Toxic Gel Nail Polish Brands 101: Choose The Safest Gel Nail Polish
Most Popular Shellac Colors – The Ultimate List Of 15 Best Shellac Colors For Fantastic Manicures
Best Gel Base And Top Coat: The Updated List Of The Best Gel Nail Base And Top Coat Sets
Why Are My Gel Nails Lifting? 15 Reasons Why Your Gel Polish Is Lifting
Overlay Nails 101: Acrylic And Gel Nail Overlay On Natural Nails – The Ultimate Guide
Best No Light Gel Polish — Gel Nail Polish Without UV Light
Nail File Grit Guide And Chart
12 Best Polygel Nail Kit Reviews And How To Apply Polygel At Home
Best Nail Dehydrator And Primer: The Ultimate Guide
Best Small Salon Reception Desk For A Tight Space: Make An Amazing First Impression!
13 Best Korean Snail Serum Products That May Seem Too Good To Be True
7 Best Korean Peel-Off Mask Products For Improving Skin Texture
14 Best Korean Snail Sheet Mask Packs That May Make Your Skin Glow