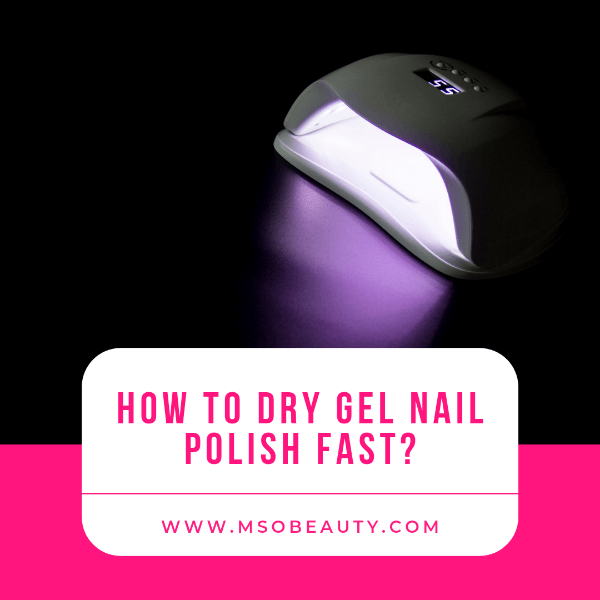
If you love having clean, shiny, beautiful nails but hate to spend too much time on your gel manicure, then you will love these tips to dry nail polish fast.
This will help you get a full gel manicure you want in less than 45 minutes and you won’t have to worry about it smearing or chipping off right away.
How to dry gel nail polish faster
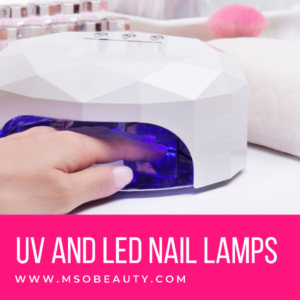
1. Use an LED lamp to cure gel nail polish many times faster
LED lamps cure gel nail polish a lot faster than pure UV lamps with bulbs.
LED lamps emit UV rays using LEDs, while UV-only lamps use UV bulbs for emitting these rays.
An LED lamp can cure gel base coat in 30 seconds and color gel polish or gel top coat in 60-90 seconds.
UV lamps can only cure gel nail products, including base coat, in no less than 2 minutes. But in reality, it may take a lot longer.
Most lamps on the market nowadays are pure LED ones and UV lamps are becoming obsolete.
The best advice is to use a lamp that is made by the same manufacturer as the polish you’re planning to use because it’s compatible with that product the most.
However, if, like me, you have many different brands in your collection you can use a popular universal LED lamp.
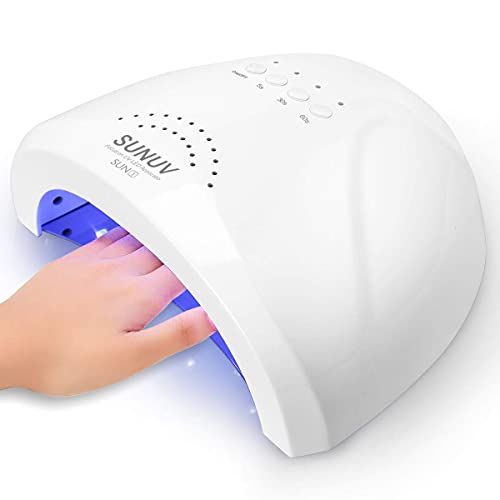
For example, SUNUV is a nice brand of lamps that is used by professional nail technicians.
I also like to use their 48W lamp to cure my favorite gel nail polishes and polygels. It dries them very fast and can fit all the fingers at once.
2. Make sure your lamp is powerful
The more power your LED lamp has the faster can it cure gel nail polish.
Select a lamp that has at least 48W of power.
It will be able to cure the base coat in 30 seconds and color polish or top coat in 60 seconds.
Plus, highly pigmented dark polishes won’t shrink under a powerful unit.
Just make sure the lamp has a special low heat setting.
This setting prevents heat spikes.
Use this setting when you’re curing the base coat, as it’s the layer that directly adheres to your natural nail and sometimes causes heat spikes.
3. Use a polish that looks opaque in 1 layer
If you use a sheer gel nail polish or a polish that is prone to going on in streaks and with bald patches you may need to apply more layers.
Some sheer polishes require 3 or even 4 layers to look good on the nails.
And you’ll have to cure each coat separately before you apply the next one. This also takes more time.
The fewer layers you need to apply the fewer layers you need to dry under the lamp.
So select a polish that gives you perfect coverage in two or even one coat.
This will make gel nail polish dry faster.
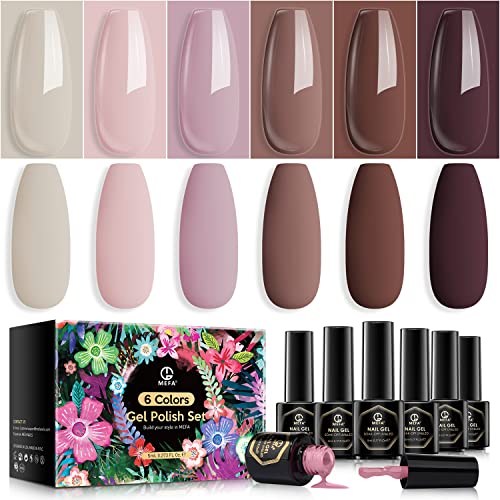
I’ve found that these MEFA nudes are very opaque and need no more than 2 layers.
4. Use a one-step gel nail polish
You won’t need to dry many layers if you use this polish.
It has all the necessary products, including the base coat, color polish, and top coat, mixed in one bottle.
So you can apply it to your bare nail and won’t have to cover it with a top coat.
This will cut the drying times drastically because you’ll only need to cure the polish layer.
This can take about 1-3 minutes, depending on its opacity.
And there’s no need to dry the base coat and the top coat, which eliminates an extra 2-3 minutes.
Out of all one-step gel nail polishes I prefer Bio Seaweed Unity gel.
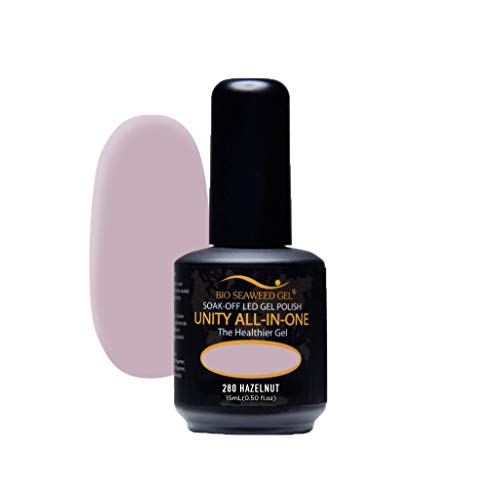
This polish is non-toxic and free from all harmful ingredients. Plus it’s vegan and completely cruelty-free.
It can even be cured under natural sun rays if you don’t have an LED lamp on hand. However, this may take more time than when you cure it with a lamp.
The downside of one-step gel nail polishes is that since the base coat is not separate they don’t last as long as the standard 3-step gel nail polishes.
Normally base coat works like a double-sided scotch tape, it’s sticky and helps the color polish stick to your natural nail plate better.
When it’s mixed in with the polish its adhesive properties get reduced slightly.
5. Alternatively, use a 2-step gel nail polish
There are also 2-step gel nail polishes on the market that combine the base coat and the color polish in one bottle.
But they still need a separate top coat.
Anyway, these polishes eliminate the need of curing one extra layer. So the drying times can be cut almost twice.
Just like 1-step polishes, 2-step polishes last less than traditional 3-step gel nail polishes because they don’t have a separate base coat that improves adherence.
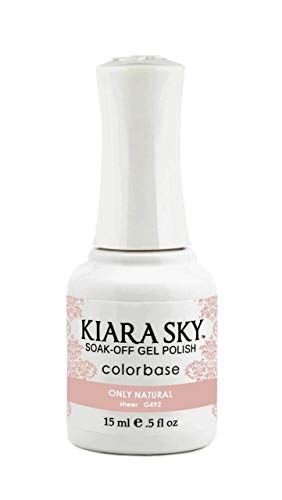
Kiara Sky Colorbase gel polishes are high-quality 2-step products. I love their colors and effects.
6. Use just a camouflage cover base coat with no color polish
If you want to apply a neutral pink or peach color you can use a colored camouflage cover rubber base gel instead of a base coat+color polish.
This will let you save time and make gel nail polish dry fast.
A camouflage cover base coat stays better than 1-step or 2-step gel nail polishes.
Plus, it’s self-leveling like hard gels. S it can make the surface of your nails look super-slick and ultra-smooth.
Just make sure you apply a rubber top coat over the rubber base gel because this base coat is flexible and harder top coats may crack with time.
7. Apply gel nail polish in thinner layers
Make sure you apply gel nail polish in thinner layers. This is what professional nail technicians recommend doing.
A super-thick layer of gel nail polish won’t dry faster.
It may take you too much time to dry or it may fail to dry at all. Plus it may shrink or wrinkle in the drying process.
A thin layer normally dries in 1 minute under a good powerful LED lamp.
In fact, drying several thin layers of gel nail polish separately one by one is a lot faster than waiting for a thick coat to dry.
So if you see that your polish of choice is too sheer apply it in 3-4 thin coats instead of one thick coat.
8. Use high-quality gel nail polish brands
High-quality gel nail polishes manufactured by the best reputable brands are guaranteed to dry well if you apply them properly.
Here is my list of the best professional gel nail polish brands.
They have been tried and tested by thousands of users and many of them are used in salons. So they are trusted by professionals who need to work quickly.
If you buy a low-quality unpopular polish from an obscure manufacturer you can end up with a substance that fails to dry.
9. Apply the color polish to 4 or even 5 fingers at once and cure them together
Instead of applying the color polish to one finger at a time and curing it individually under the lamp you can apply the color polish to 5 fingers or at least 4 fingers and cure them together.
Just do it carefully to avoid smudging the uncured polish.
If you paint 4 fingers at once you can apply the polish to the thumb later.
So you can cure one layer of polish in 1 minute for 4 fingers + 1 minute for the thumb and be done in 2 minutes instead of spending 4 minutes on four fingers only.
If you’re not skilled enough to paint 4-5 fingers before curing them try to paint at least 2 fingers and cure them together. This will let you dry gel nail polish 2 times faster anyway.
If the polish runs into the cuticles while you’re applying it fix it before drying
If you don’t fix your mistake and cure that layer with a smudge every next layer will also run into the cuticles in that spot and you’ll need to spend more time fixing your manicure.
10. Use a bigger lamp
To cure all fingers at once or at least 4 fingers at once, make sure you get a lamp that’s spacious enough inside to fit them all.
Plus, it must have a good distribution of LEDs to provide even curing.
Portable mini lamps won’t fit all your fingers at once.
Here were all the tips and tricks that will help you dry gel nail polish fast.
As you can see, the drying times of gel nail polishes depend on many factors, including their quality, the power and type of your lamp, the number of layers you use, and your application skills.
Just remember, the usual tricks people use to cure regular polish fast won’t work on gel nail polish.
No need to employ a fan, hairdryer, a special nail polish dryer, cold water, ice, or oils — all these tricks won’t be effective and may ruin your gel manicure.
Recommended reading:
Gelish Steps: Application And Removal
How Long Does Essie Nail Polish Take To Dry?
What Color Nail Polish Goes With A Burgundy Dress?
Gelish Vs Shellac: What’s The Difference Between Gelish And Shellac?
6 Best Coral Nail Polishes And Polish Sets
4 Best Jelly Gel Nail Polish Sets
Best Shellac Colors For French Manicure
Best Professional Gel Nail Polish Brands Used In Salons
Non-Toxic Gel Nail Polish Brands 101: Choose The Safest Gel Nail Polish
Best No Light Gel Polish — Gel Nail Polish Without UV Light
Best Gel Base And Top Coat: The Updated List Of The Best Gel Nail Base And Top Coat Sets
Best Small Salon Reception Desk For A Tight Space: Make An Amazing First Impression!