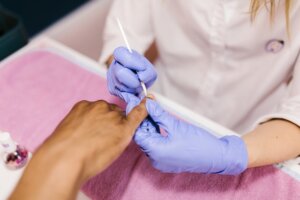
Here is a complete guide on how to apply gel nail polish perfectly and on what you need to have in your gel nail application kit.
This is a no-nonsense step by step blueprint with all the info that you need to know on how to use gel nail polish. Including the answers to some of the most frequently asked questions. So you can do your own gel manicure at home, without visiting a salon. First, here’s the gel nail polish application kit that will cover most of your basic needs:

How to use gel nail polish: short step by step
How to apply gel nail polish perfectly at home
- Soften and push away the cuticles.
- Shape the nails to your desired shape with a nail file.
- Buff the shine off the nail plate, but don’t over-buff.
- Clean all the dust and debris by wiping the nail with 99% Isopropyl Alcohol and a lint-free wipe.
- Dehydrate the nail plate.
- Apply a coat of the nail primer for better adhesion to the tip of your nail (this step is optional for many gel nail polish brands). Let it air dry.
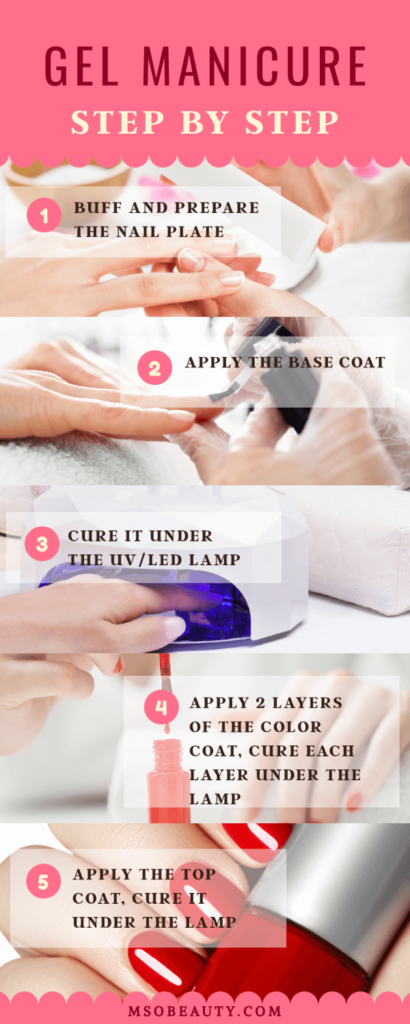
- Gel manicure is a 3-step system that requires the application of a base coat, a color coat, and a top coat.
- And each layer needs to be cured with a UV/LED lamp.
- Apply one thin layer of the base coat, cure it under the lamp.
- Shake the color gel polish bottle before application to distribute the pigment.
- Apply two coats of the color gel polish, cure each layer under the lamp.
- You may need more layers if the polish is too sheer.
- Apply the top coat, cure it.
- Make sure to apply each product in a very thin layer or your manicure won’t last.
- Use the 3 stroke method to apply each gel nail polish product layer.
- Cap the free edge by swiping the brush along the free edge when you are applying each layer (this step is optional).
- If you stain your cuticles or the surrounding skin wipe the excess polish off before curing, or your polish will peel off later.
- If your top coat is a no wipe one then your manicure is done after you have cured it.
- If it’s an ordinary one and it stays sticky after it’s been cured, you’ll need to wipe the tackiness off with 99% Isopropyl Alcohol and a lint-free wipe.
- When you’re done, apply some cuticle oil and hand cream.
How to remove gel nail polish at home
- Remove the gel polish off by soaking it off.
- Use cotton balls with an acetone-based remover.
- Wrap each fingertip in a piece of foil with a cotton ball placed inside the foil and pressed against the nail for 10 minutes or more. Or use a special nail clip.
- Push the softened polish off your nails with an orange stick or a cuticle pusher.
How to apply gel nail polish perfectly: a detailed guide
Here is a more detailed explanation of how it all works with some tips on choosing the right materials.
Let’s dive right in!
Preparation
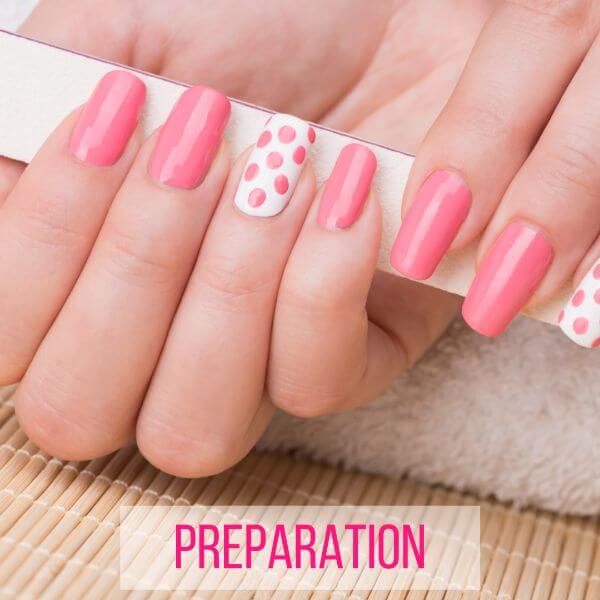
When using gel nail polish over natural nails you need to prepare the nail plate.
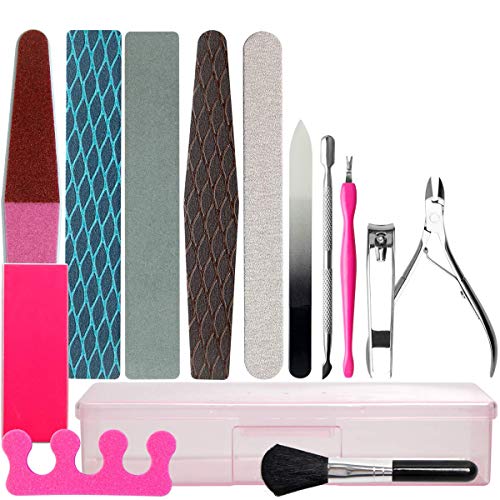
SOFYE Nail Files, Buffers, And Tools Set
Push the cuticles away
First, you need to soften and gently push the cuticles away with an orange stick or a cuticle pusher.
You can soften the cuticles with a special cuticle remover liquid.
Sally Hansen Cuticle Remover
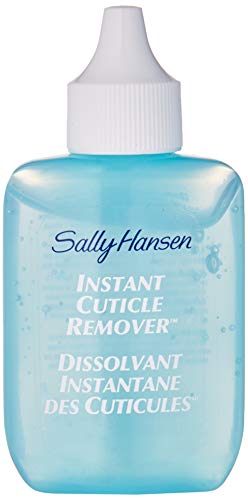
I love this Sally Hansen Remover and I use it for my own at-home manicures.
Just don’t use it too often, according to the manufacturer’s instructions.
Shape the nails
After that, you have to shape the nails to the desired shape and length with a nail file.
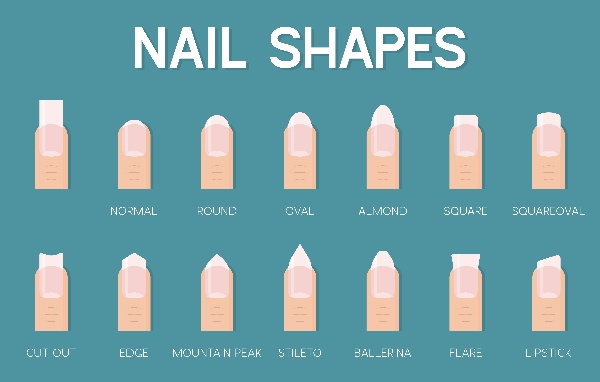
Some of the most popular nail shapes are:
- Oval
- Square
- Almond
- Rounded
- Squoval
- Ballerina
- Stiletto
Buff the nail plate
It’s also necessary to buff the top surface of the nail plate with a nail file a bit to remove shine.
This will help the base coat adhere better.
Roughen:
Do it with the purpose of roughening your nails.
Don’t make your nails even shinier and smoother with buffing.
That will prevent good adhesion instead of improving it.
How to buff:
Move the nail file along the nail plate from the free edge to the cuticle line and back again. Against the direction of the nail cells’ growth.
Don’t buff across the nail plate from left to right.
Do it only once until you don’t see shine anymore.
Don’t overbuff the natural nail plate.
If you are using CND Shellac you don’t need to buff your nails, which is a big plus of this brand.
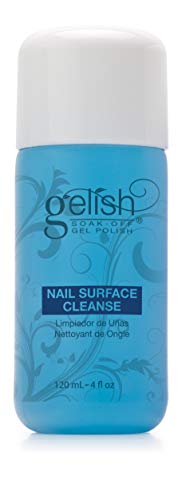
Clean and dehydrate the nail plate
The next step is cleaning the nail plate with a cleanser that contains 99% Isopropyl Alcohol and a lint-free wipe.
Lint-free wipes:
Don’t use cotton balls for cleaning the nails because cotton leaves lint behind.
Only use lint-free wipes.
No cuticle oil yet:
Don’t use any cuticle oils or hand creams before you completely finish your gel manicure
Oils from these products won’t let your nail polish stick to your nails.
Mia Secret Dehydrator And Primer

Remove the natural oils from your nails with a nail dehydrator by brushing it on.
Apply the dehydrator directly to the nail plate in one coat.
Let it evaporate.
Primer
Some professional gel nail polish brands may require the use of a special primer.
You have to apply it just before the base coat.
This depends on the polish.
Some manufacturers require it and some don’t.
Do I need to use a primer?
Primer is needed for better bonding of the base coat and the gel polish with the natural nail plate.
It also protects the nails, for example, from fungus.
Even if your gel nail polish brand of choice doesn’t require the use of a primer it’s still a good idea to apply it.
The reason?
It will make your manicure last longer.
Acid-free nail primer
Make sure to get an acid-free primer because it’s a new generation product that is pretty much universal.
Acid-free primer is quite gentle and is good for nearly any type of nail plate.
Acid primer:
Acid primer is only needed for hands that have problems, such as hyperhidrosis, when no nail polish ever stays on well.
How to apply nail primer
Apply it in one thin coat only to the natural nail plate.
Don’t use too much primer or your manicure will lift.
No need to apply the primer to nail extensions.
Don’t go all the way to the cuticles.
That may make gel nail products glide and leak into the cuticles.
And avoid staining the cuticles.
So leave a bit of free space near the cuticles.
You can even apply it to the area near the free edge only.
In this case, it will be easier to remove your polish later.
Don’t cure:
No need to cure the primer. It air dries in about 30 seconds.
How to apply gel nail polish perfectly: 3 steps
Most gel polishes require a 3 step application process: base coat, color coat, top coat.
The first step is the application of the base coat in one thin layer.
Base coat
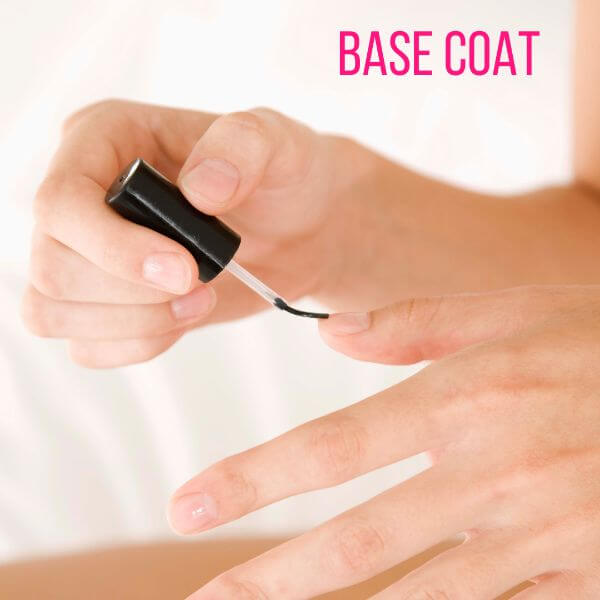
So the base coat is the first product you need to use after you’ve prepared the nail plate.
Gelish Dynamic Duo Base Coat And Top Coat
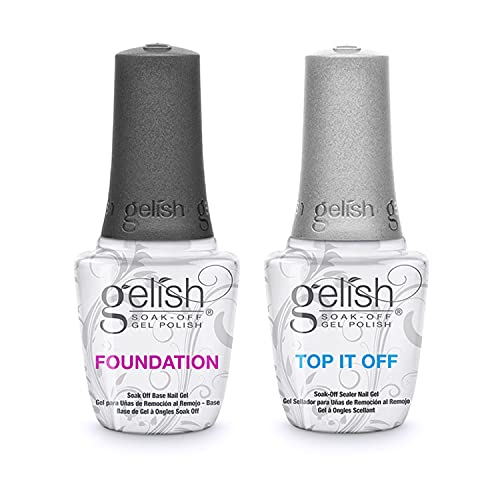
There are two kinds of base coats: the regular liquid gel base coat and the rubber base gel.
Regular gel base coat
The most common kind of base coat is the transparent liquid one.
It’s the most widely used base coat that every gel nail polish brand carries.
Bonding agent:
This base coat does the job and bonds your gel manicure to your nails.
It helps the color polish layers adhere to the nail plate and it also protects your nails.
Rubber base gel
There is also a new generation of gel base coat called the rubber base gel.
What is the rubber base gel?
Rubber base gel is a thicker kind of base coat that creates better bonding of the color coat with your natural nail plate and prevents chips and peeling.
It also provides a smooth coating that hides all the imperfections of the natural nail.
Rubber base gel makes your manicure last even longer than an ordinary base coat.
Some people manage to wear manicure with this kind of top coat for up to 4 weeks.
That’s why nail techs love to use rubber base gel on their clients.
It’s a professional product that’s also fine to use at home.
However, since it’s thicker than the ordinary gel base coat, it may be more difficult to apply in thin layers if you are a beginner.
Kodi Rubber Base Coat
One of the most famous rubber base gel manufacturers is Kodi.
They were one of the first brands of rubber base gels on the market.
How to apply gel nail polish perfectly: color coat
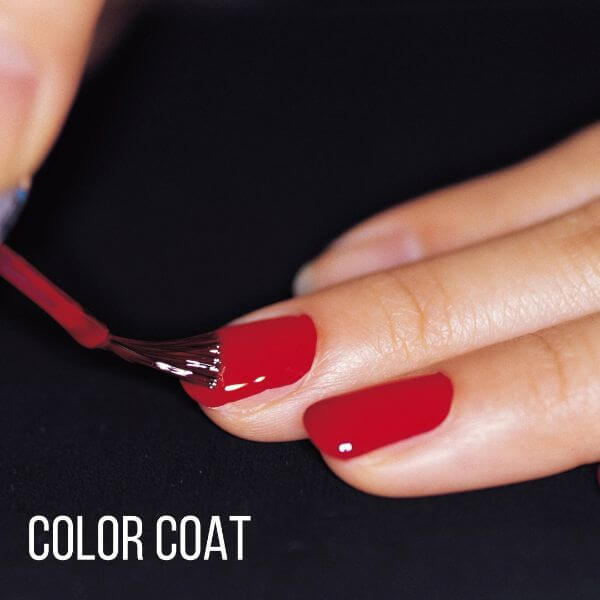
The second step is the application of the color coat.
Color coat layers
Most gel nail polishes need to be applied in two thin layers.
Remember to cure each layer separately before you apply the next one.
Again, it’s better to apply several thin coats of color polish instead of one thick coat.
Gel nail polish thickness
The best gel nail polish is one that is not too thick and not too runny.
Thicker gel nail polishes are more difficult to apply in thin coats.
But on the other hand, thin products are hard to apply as well.
They tend to run into your cuticles and make your manicure messy.
Gel nail polish pigmentation and color
Some products are more pigmented.
So even one thin layer of color polish may be enough for full coverage.
Without any streaks or see-through patches.
Certain polishes, like light pink colors used in a French manicure, are really sheer.
They may require 3 or even 4 layers to look best.
Best gel nail polish is not necessarily the most pigmented one.
A sheer polish is not bad.
The coverage usually depends on the color.
Both professional gel nail polish used in salons and any budget polish can be sheer or pigmented.
Don’t forget to shake the color gel polish bottle well before you use it.
This step is necessary to distribute the pigment more evenly.
Most brands offer a large selection of colors.
You can choose your favorite ones from hundreds of shades.
Sets of gel nail polishes
Some gel nail polish manufacturers even sell gel nail polish in large variety sets.
Beetles Spring Into Summer Collection
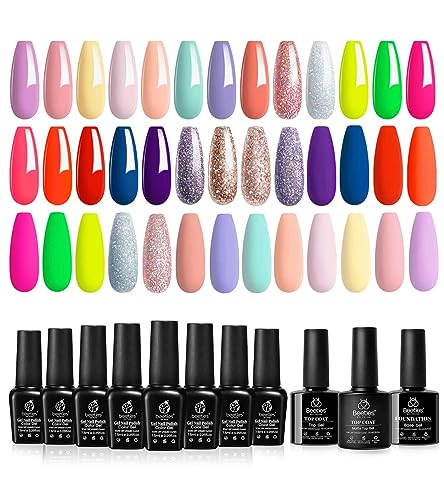
For example, Modelones, Beetles, and Gellen sell huge sets of 12, 16, and even 20 colors.
Gelish, Orly, and many other brands manufacture seasonal sets.
Such as summer, spring, and holiday collections.
Some companies sell beginner kits with color polishes.
They come with the base coat, the top coat, primers, cuticle oils.
And even manicure tools and lamps.
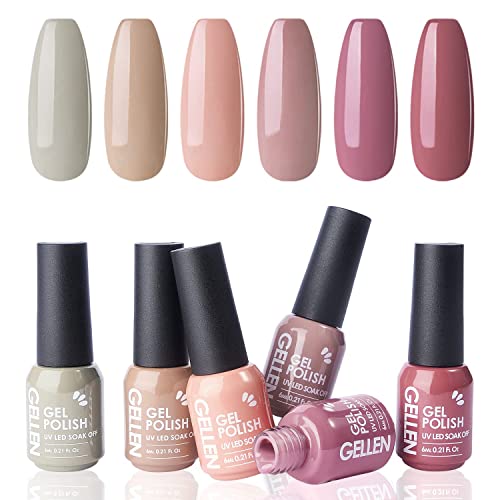
Color changing gel nail polishes
There are also gel nail polishes that have more than one color in a single bottle
They can change between 2 or 3 colors according to temperature.
These gel products are called mood changing gel nail polishes.
Gellen manufactures products like these.
Gellen Mood Changing Gel Nail Polish Set
Kiara Sky makes glow in the dark polishes
These products glow at night in addition to changing color.
2-step gel nail polishes
There are 2-step gel nail polishes on the market
For example, Kiara Sky mood changing gel nail polishes.
These polishes don’t require the use of the base coat.
You can apply the polish to your nails directly and finish it off with a top coat.
And that’s it!
The base coat is optional.
However, I recommend using the base coat with 2-step polishes anyway.
That really prevents lifting.
By the way, CND Vinylux is a gel-like 2-step nail polish
It’s different from UV gel nail polishes and you don’t need a base coat for it.
Use thin layers
In fact, you need to apply all gel products, including the base coat, the color coat, and the top coat in very thin layers.
If you apply the base coat or the gel polish in a thick coat it won’t stay on your nails and won’t look good.
Your gel nail polish may shrink or bubble up while you are curing it in the lamp.
And later it will peel off.
It may even fail to get fully cured and that also leads to peeling.
Pick up only a small amount of product
To avoid all these problems and to prevent small bubbles from appearing in the base coat layer or other layers of your gel manicure you need to pick up small amounts of the product from the bottle.
Wipe the excess polish from your skin
Make sure that any gel nail polish product doesn’t run into your cuticles.
Or your gel manicure will peel off.
If you accidentally stain your skin wipe the gel product off before you cure it.
How to apply gel nail polish perfectly: application technique
Short strokes
You should apply the gel nail polish in almost the same way as an ordinary polish.
So how to apply gel nail polish perfectly?
Use the 3-stroke method!
3-stroke method

Place a small drop of the polish at the center of the base of the nail.
About 1 mm away from the cuticles.
Spread it to the free edge.
Do two more strokes — one on each side of the nail to cover the rest of the nail plate.
Use this same technique for each layer of the color coat, the base coat, and the top coat.
Cap the free edge
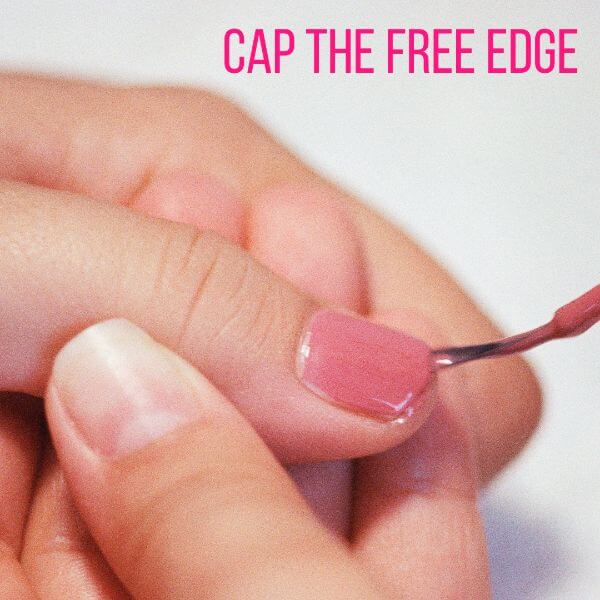
Capping the free edge means swiping the brush along the extension edge with a bit of product on, while you are applying each layer.
This prevents the manicure from peeling off.
And it’s very effective for thin nails.
If you decide to seal the free edge do it with every layer you apply: the base coat, all the layers of the color coat, and the top coat.
Make sure you only use a minimum amount of product when you are capping the free edge.
Your brush should be almost dry.
And don’t paint the underside.
Excessive polish on the extension edge would add unnecessary bulk.
This may actually cause peeling instead of preventing it.
It’s very hard to cap the free edge on short nails without staining the skin.
If this happens just wipe the polish from your skin before you cure the layer.
To cap or not to cap?
Some nail techs have stopped capping the free edge on their clients.
Instead, they finish the manicure by filing the free edge a bit to make its end absolutely smooth.
Most gel nail polishes available today adhere to the nail plate really well.
You can wear them with no peeling even without sealing the free edge.
And capping may make the end of the free edge bumpy and bulky.
So this step is optional.
How to apply gel nail polish perfectly: top coat
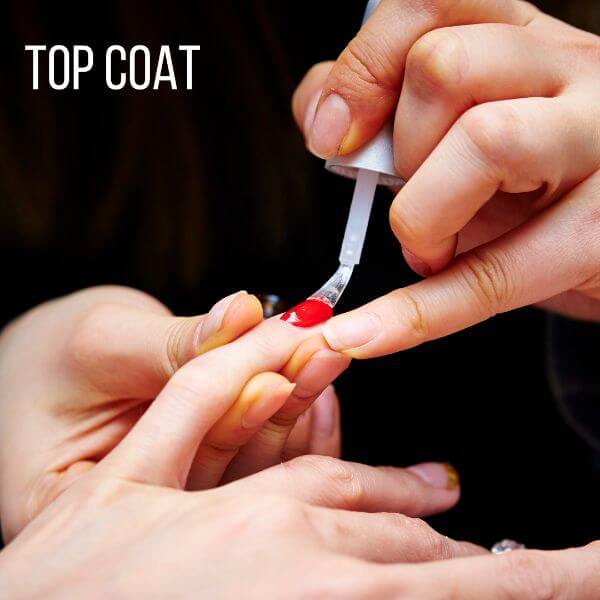
The last step in your gel manicure is the application of the top coat.
The top coat protects all the layers of the gel polish underneath and helps your manicure stay longer and look better.
Just like you do with the base coat, apply the top coat in one layer only.
Cover the color polish layer completely.
Glossy top coat
The ordinary, glossy kind of top coat adds more shine to the finished manicure.
By the way, glossy top coats are not the only kind of top coat on the market.
Matte top coats exist too!
Matte top coat
If you want to create the trendy matte look you need to buy a matte gel top coat.
Don’t even try looking for a matte color gel polish.
It doesn’t exist in this timeline.
You won’t find it!
A special matte top coat is the product that creates the lovely velvety effect on your nails.
The top coat turns matte after you cure it in the lamp.
Rubber top coat
The best top coat to use with the elastic rubber base is the rubber top coat.
Harder top coats may crack when applied over a more flexible material.
While the rubber top coat is as flexible as the rubber base coat.
Wiping the sticky layer off
Many gel top coats stay sticky after curing.
So you need to wipe the tackiness of your nails with 99% Isopropyl alcohol and a lint-free wipe.
Gelish Nail Cleanser
Just make sure not to rub the tackiness you are wiping off into the surrounding skin.
Only wipe the nail plates.
No-wipe top coat
If you don’t want to bother or are tired of wiping the sticky layer off many companies manufacture no wipe top coats.
You just cure the no wipe gel top coat and you’re done!
It’s already not tacky.
The last step with wiping the stickiness off is not needed at all.
These no wipe top coats are less flexible though.
Therefore they may not be a good match for some other flexible materials, like rubber base coats.
Rubber top coats are always wipe-off ones.
How to use gel nail polish: curing it
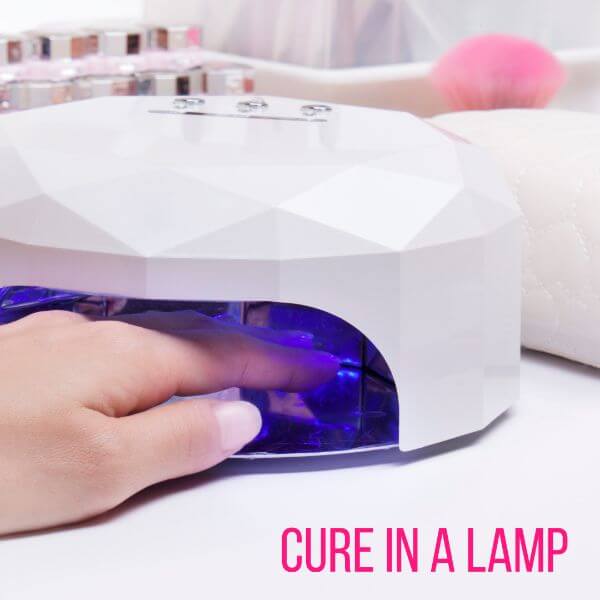
The base coat, every layer of the color polish, and the top coat need to be cured separately in a UV/LED lamp.
How to choose a lamp?
It’s always better to use a UV/LED lamp made by the same manufacturer that makes your gel nail polish of choice.
The manufacturer fine-tunes the lamps to work with their own polishes.
However, thankfully, there are lamps on the market that work quite well with all kinds of gel nail polishes, both UV and LED ones.
You may want to get a lamp like this if you don’t want to be tied to a particular gel polish brand.
And I’m pretty sure you’d want to try at least a few brands.
UV vs LED for curing gel nail polish
UV lamps use bulbs that emit UV rays and LED lamps have LEDs that emit UV radiation too.
However, UV bulbs emit a much wider wavelength range than LED lights.
Therefore UV-only lamps (with long bulbs) are universal.
So they can cure any brand of gel nail polish products.
UV-only polishes?
There used to be UV only gel nail polishes, like CND Shellac, that you couldn’t cure under an LED lamp.
But today most gel nail polish brands are both UV and LED ones anyway.
Even CND has changed Shellac’s formula to make it LED curable too
UV-only lamps are becoming less popular
UV-only lamps need a lot more time to cure gel nail polish than LED lamps.
So many nail techs no longer use UV-only lamps.
Normally, 2 minutes under a UV lamp are equivalent to about 60 seconds in an LED lamp.
The base coat is the quickest product to cure.
Most base coats take about 30 seconds to dry completely.
The curing speed also depends on your lamp’s wattage (electric power).
The more wattage the quicker it works.
Lamp safety
According to the US Food and Drug Administration, nail curing lamps are low risk when used as directed by the label..
Some powerful LED lamps may cause heat spikes during the curing process.
Especially when you are curing the base coat.
After all, this is the product that goes directly onto the natural nail plate.
You may prevent this by applying thin coats of product, as I’ve already recommended above.
Thick layers cause the heat spikes more often.
Also, use the low power setting for curing the base coat more gently.
Not all lamps have this mode.
SUNUV 48W UV/LED Lamp

SUNUV is a nice UV/LED lamp used by professionals worldwide.
It’s pretty powerful but has a low power setting.
You can turn this setting on to cure the base coat safely.
And this lamp is pretty much universal.
So it can cure any brand of gel nail polish well.
Cuticle oil and hand cream
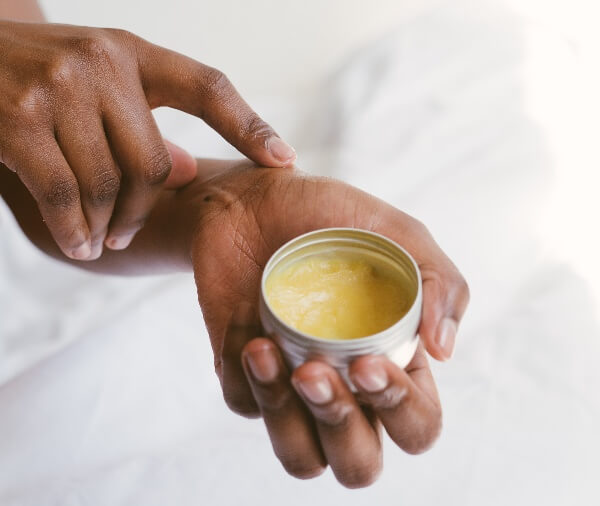
You can also apply nourishing cuticle oil to your cuticles and use a bit of hand cream.
CND Cuticle Oil

Do it only after you’ve done your manicure, fully cured the last layer, and removed stickiness if your top coat is a wipe-off one.
Massage the cuticle oil into your cuticles in an upward motion from the nail plate.
Use cuticle oil regularly for softening and protecting the cuticles afterward.
Hand cream
You can use a hand cream rich in Shea butter, which is a very nice moisturizing ingredient.
L’Occitane Shea Butter Hand Cream

I personally use the L’Occitane Shea butter cream, it makes my hands really soft.
Natural nails vs acrylic nails
You can use gel polishes on your natural nails or on acrylic nails and dip powder nails.
You may want to use gel nail polishes on acrylic or dip powder nail extensions to create nail art.
Or to cover your nails with a color that simply doesn’t exist in your acrylic powder or dip powder color palette.
In fact, gel polish adheres better and lasts longer on acrylic nails.
So you don’t even need to use the base coat when you apply salon gel nail polish to acrylic nails.
How to use: gel nail polish vs regular polish
The main difference between a gel nail polish and a regular nail lacquer is the drying process.
Gel nail polishes can only get cured in a special UV or LED lamp.
While ordinary polishes can simply air dry.
You shouldn’t use a lamp to cure ordinary lacquers.
It won’t work.
By the way, gel nail polishes are always sold in opaque bottles to prevent natural UV rays from the sun from thickening the polish and ruining it.
Gel nail polish also almost always requires the use of a base coat and a top coat.
While an ordinary polish can work without these products.
Gel-like polish vs gel nail polish application
Gel-like nail polishes air dry, just like ordinary lacquers.
They are a cross between a gel nail polish and an ordinary polish.
So they have a durable formula.
But at the same time, they don’t need a lamp.
Here’s an example:
CND Vinylux is Shellac’s sister gel-like polish.
It doesn’t need a lamp, but it’s a 2-step system.
You need to apply the polish directly to the nail plate, without any base coat underneath.
After the polish dries, you need to apply the special Vinylux top coat.
All the layers simply air dry.
Gel nails lifting
The most common issue with gel manicure is lifting.
Here are the reasons why gel nails are lifting:
- Oily or moist nails.
- Cuticles left on the nails
- Nails have too much moisture before application.
- Damaged, bleeding cuticles.
- Nails buffed with a buffing block to be too smooth.
- Overbuffed nails when the nail plate is too thin.
- No primer used.
- Too much primer used.
- No base coat used.
- Thick layers of product.
- The product shrinks or bubbles up under the lamp.
- The product hasn’t cured properly.
- The product has run into the cuticles and has not been removed before curing.
How to remove gel nail polish at home
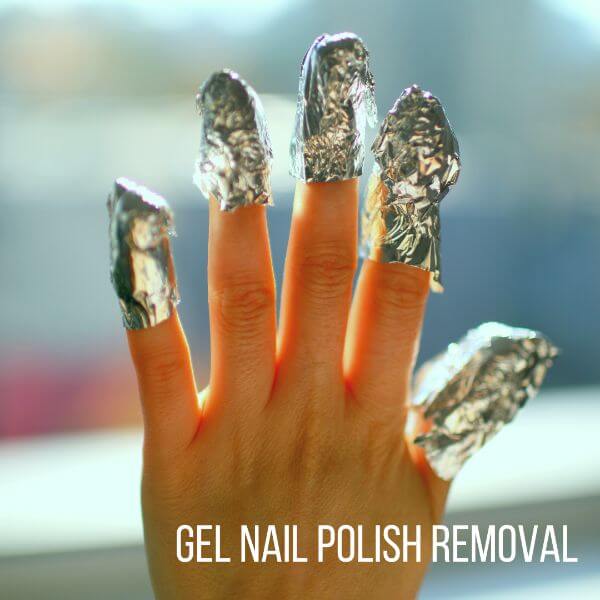
The easiest way to remove gel nail polish at home is simply soaking it off.
To do that, you need to moisten cotton balls with an acetone-based nail polish remover.
Gel Polish Remover

After that, put one cotton ball to each nail plate.
Wrap each fingertip in a piece of foil so that the cotton ball stays pressed to the nail.
You can also use a set of special nail clips.
Gel Polish Removal Kit With Clips

Hold the nails like this for about 10 munites, sometimes more, depending on your gel nail polish.
After you unwrap your fingers, the polish should already be softened enough.
So just push it off the nails with an orange nail stick or a cuticle pusher.
Some people also file the gel nail polish off with a nail drill.
Now you know how to apply gel nail polish like a pro. Have fun using it!
Recommended reading:
Best Professional Gel Nail Polish Brands Used In Salons
Best Gel Base And Top Coat: The Updated List Of The Best Gel Nail Base And Top Coat Sets
Color Changing Gel Nail Polish: Best Mood Changing Gel Nail Polish Brands
Kiara Sky Gel Polish: Full Review And Buying Guide
Best No Wipe Gel Top Coat: An Honest Review Of 12 Best No Wipe Top Coat Gel Brands
Rubber Base Gel 101: The Rubber Base Coat And Rubber Top Coat Ultimate Buying Guide
Non-Toxic Gel Nail Polish Brands 101: Choose The Safest Gel Nail Polish
Most Popular Shellac Colors – The Ultimate List Of 15 Best Shellac Colors For Fantastic Manicures
Kupa ManiPRO Passport Nail Drill Review: The KUPA E-File That Nail Techs Swear By
Best Nail Dehydrator And Primer: The Ultimate Guide
What Is Gel Nail Polish? All Your Questions Answered!
Nail Shapes Chart And Types Of Nail Shapes — The Ultimate Guide
How To Shape Almond Nails — The No Nonsense Guide
11 Best Nail Files For Natural Nails That’ll Make Nail Shaping Easier
Gelish Steps: Application And Removal