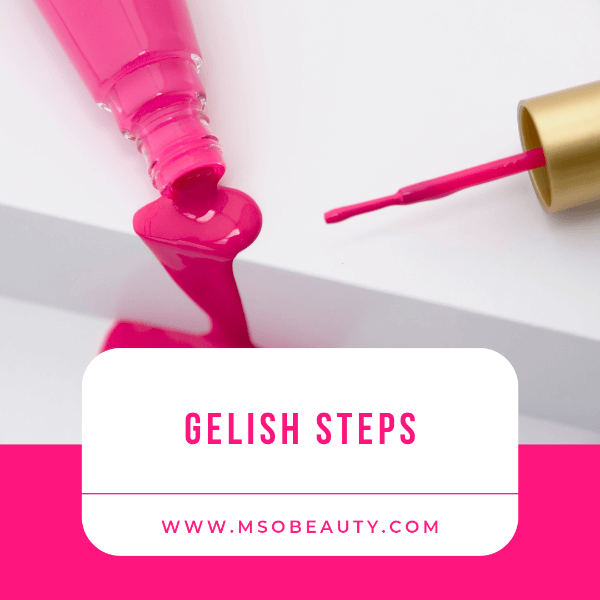
Gelish is one of the best and most popular gel nail polish brands on the market. If you’ve bought this product and don’t know how to use it properly, don’t fret. In this tutorial, I’ll list all the steps needed to apply and remove Gelish gel nail polish.
The application process is simple and pain-free, and the results are stunning. Gelish is perfect for those who want to get a salon-quality manicure at home.
What you will need
1. Gelish gel nail polish
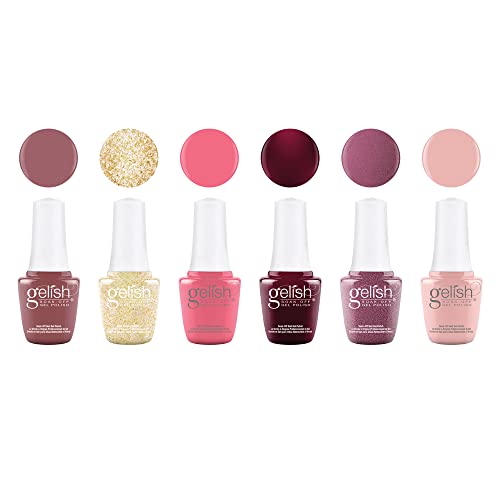
Obviously, the first thing you need for a Gelish manicure is the brand’s nail polish.
These polishes are available in more than 190 colors.
Gelish offers a huge variety of colors, ranging from bright and vibrant ones to more neutral tones.
So you can choose the one you like or get a whole set of mini bottles for creating beautiful nail art.
In addition to the Gelish gel nail polish, you will need some additional supplies and tools to prepare your nails for the polish application and to help it stay for a long time.
2. Nail prep supplies

Cutting cuticles at home is not too safe and makes the cuticles grow even more.
So I always use a cuticle remover.
My favorite one is Sally Hansen. It removes the cuticles super-quickly.
However, its downside is that it dries the skin around the nails.
So don’t forget to moisturize your hands and cuticles after the manicure.
- Cuticle pusher or an orange stick
You’ll need this tool to push away the cuticles.
Nail techs prefer a stick to the pusher because they can just toss it away after use, so it’s more hygienic.
Plus, a wooden stick is less damaging to the nail plate than a metal pusher tool, which can make your nail develop ridges.
- Nail file
Get a good quality nail file for natural nails.
I always use a crescent-shaped emery board 100/180 grit nail file to shape the nails and buff the nail plate.
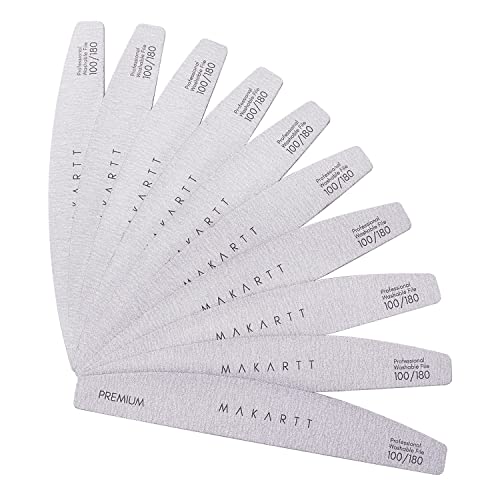
This file is easy to clean, the 180 grit is perfect for natural nails, and the shape is very convenient for holding in my hand.
Plus, if you buy a whole pack you can replace it every so often — this is more hygienic.
- Nail cleanser
This liquid is needed to make the nail plate clean and remove any residue from filing.
You can use Isopropyl Alcohol instead. Or even any rubbing alcohol.
- Dehydrator, base coat, top coat, cuticle oil
The dehydrator removes the oils and moisture from the nails to help the polish adhere better.
It’s optional but Gelish stays a lot better if you do use dehydrator.
However, don’t skip the base coat and top coat.
Gelish is a 3-step gel nail polish system, the steps are – the base coat, color coat, top coat.
You can’t expect great results if you don’t use these two additional products with your polish.
And the cuticle oil is needed at the end to moisturize the cuticles and to compensate for the impact of the remover, cleanser, and dehydrator.
Make sure you just never use any oils before applying polish.
I recommend getting the excellent Gelish Fantastic Four kit.
It contains a dehydrator, base coat, top coat, and cuticle oil.
The base coat and top coat are formulated to match the brand’s polishes perfectly.
Plus, the extended version of this kit comes with a nail cleanser and gel nail polish remover
- UV/LED lamp
The last but not the least thing you’ll need is a UV lamp.
Without it, you will never be able to dry Gelish gel nail polish because it only polymerizes under UV rays.
You can buy an LED lamp because it cures the polish very fast.
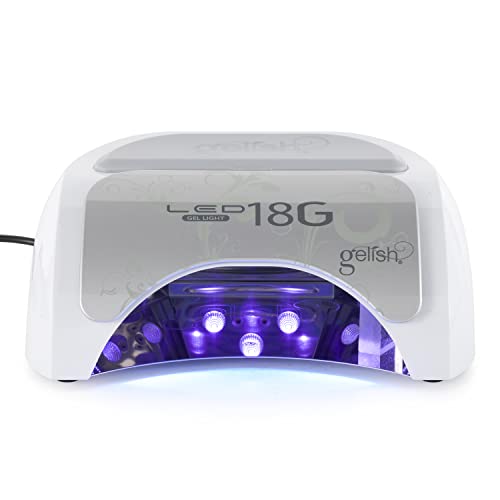
Gelish professional 18G lamp is ideal for the brand’s polishes. It’s a very advanced unit with great functionality.
But you can use any universal UV/LED lamp with Gelish.
Gelish gel nail polish application steps
1. Nail prep
- Filing
First, shape your nails to the desired shape with a nail file.
Several shapes look great on natural nails.
The most popular ones are oval, round, square, and squoval.
The round and oval ones are the best for long wear because square nails are prone to chipping in the corners.
- Removing cuticles
Excess cuticles get in the way of the polish and make it lift.
No need to cut them.
Just use a cuticle remover to soften them and an orange stick to push the skin away.
Use the cuticle remover according to the instructions.
Usually, you need to apply it in a thin layer over the cuticles and remove it after about 30 seconds.
- Cleansing
Cleanse and sanitize your nails with a nail cleanser or Isopropyl Alcohol to get rid of cuticle bits and filing debris.
- Dehydrating
Apply the pH Bond dehydrator or any other dehydrator of your choice in one thin coat all over the nail plate.
Don’t add too much product because it must evaporate quickly.
Don’t be afraid if you see your nail becoming whiter at that point. It’s normal. This means the dehydrator is working as it should and the oils and moisture are going away.
2. Base coat
Apply the base coat in one thin layer.
Make sure the layer is thin enough and the base coat hasn’t run away into the cuticles.
A thick layer of base coat will act as a magnifying lens in the UV lamp. It will increase the power of the rays and cause painful heat spikes but at the same time, it may fail to cure.
Cure the base coat for 30 seconds under an LED lamp or 2 minutes under a UV lamp.
If the base coat stays tacky after curing it’s normal. This will help the polish to stick.
3. Color polish
Gelish is usually very well-pigmented and becomes opaque in 2 coats.
Apply 2 coats of polish and cure each one for 60 seconds under an LED lamp or 2 minutes under a traditional UV lamp before you apply the next one.
Gelish color polish application steps:
- Use 3 long strokes to paint the entire nail plate.
- One stroke will cover the middle of the nail plate and the other two will go over the sides.
- To paint each stroke, place a drop of polish near the cuticle line and extend it to the free edge of the nail.
- Cap the free edge of the nail with each coat of polish, including the base coat and the top coat, by painting a thin line of polish over the free edge’s end.
- If your nail polish is still sheer or streaky add another thin coat of polish for opacity.
When curing polish make sure it’s fully dry and not soft in the middle.
If it’s still soft, add another cycle under the lamp.
4. Top coat
Apply the top coat in one thin layer and cure it for 60 seconds under an LED lamp or 2 minutes under a UV lamp.
If the top coat stays sticky after curing it’s also normal.
But you don’t want to leave it that way.
So use the nail cleanser or Isopropyl Alcohol with a lint-free wipe to remove this tackiness off the nail’s surface.
Just wipe the nail’s surface lightly until the tackiness goes away. This is the last step of your Gelish manicure.
5. Cuticle oil
Apply the cuticle oil over the cuticles and rub it in. This will moisturize them and protect them from the negative impact of the environment.
Gelish gel nail polish removal steps
What you’ll need to remove Gelish
- Acetone-based nail polish remover
Acetone is great for removing any gel nail polishes, including Gelish.
It soaks off the polish in 10-15 minutes by making it softer. So you can push the remaining polish off your nails with an orange stick.
Non-acetone remover is not effective enough and won’t work on the polymerized gel nail polish.
- Cotton balls and foil wraps
Cotton balls must be soaked in the remover and foil wraps to keep the cotton balls in place, help them stay on your nails while you’re soaking the polish off, and prevent the remover from evaporating to help it work better.
- Orangewood sticks
After the polish has softened, you can use orange sticks to completely remove it and scrape it off the nail plate.
- 100/180 nail file or buffer
Filing the surface of the polish layer is necessary to ease the removal process and let acetone do its work faster.
- 200/280 nail buffer
This buffer is necessary to buff the surface of the nail to perfection after you have removed the polish.
Gelish removal steps
- Break the top coat’s surface by filing it gently with a 100/180 emery board nail file or buffer. This will let acetone get through to the polish and dissolve it.
- Soak cotton balls or cotton pads with an acetone-based nail polish remover and place them on your nails. Use one pad for each finger.
- Wrap each fingertip with the cotton ball pressed against the nail in a foil wrap.
- Wait for 10-15 minutes for acetone to do its work and to soak the polish off.
- Remove the foil wraps and use an orange stick to push the gel polish off your nails. Don’t press into the nail plate or you will make it grow ridged and wavy.
- Buff the nail plate to perfection with a 200/280 nail buffer.
Recommended reading:
How To Dry Gel Nail Polish Fast: 10 Tips And Tricks
How Long Does Essie Nail Polish Take To Dry?
What Color Nail Polish Goes With A Burgundy Dress?
Gelish Vs Shellac: What’s The Difference Between Gelish And Shellac?
6 Best Coral Nail Polishes And Polish Sets
4 Best Jelly Gel Nail Polish Sets
Best Shellac Colors For French Manicure
Best Professional Gel Nail Polish Brands Used In Salons
Non-Toxic Gel Nail Polish Brands 101: Choose The Safest Gel Nail Polish
Best No Light Gel Polish — Gel Nail Polish Without UV Light
Best Gel Base And Top Coat: The Updated List Of The Best Gel Nail Base And Top Coat Sets
Best Small Salon Reception Desk For A Tight Space: Make An Amazing First Impression!