Clear polygel is amazing for creating gorgeous transparent nails. It’s also ideal for building a base for sculpted nails that you can cover with any gel nail polish color that you like, for incorporating large diamonds into nail designs, and for encapsulating glitters, foils, color polygel, feathers, dry flowers, and other embellishments.
Here are the best clear polygels and polygel nail kits reviewed with all their pros and cons.
My top 3 picks


Best clear polygel nail kit reviews
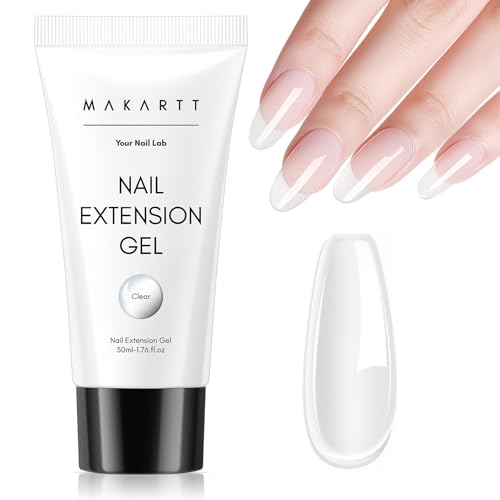
Makartt — super-clear, strong, and professional
Pros
No cloudiness
This polygel is absolutely crystal clear. Probably the clearest jelly polygel on this list.
It’s perfect for encapsulating dry flowers, glitter, foil flakes, feathers, etc.
You can create beautiful and unique aquarium French manicure nails with it by encapsulating embellishments inside this clear polygel.
Or you can mix it with pigment powders and glitters to make your own unique polygel colors.
Firm
This polygel is thick, firm, sturdy, stays where you put it, and holds its shape while you’re working with it.
Firmness adds strength to this material so it’s not easy to break.
No smell
Polygel is pretty much odorless, which makes it better than acrylic because polygel doesn’t need a smelly monomer.
You’ll have to use an odorless slip solution instead.
And this particular polygel is, of course, odorless too.
Comes with instructions
Makartt polygel has the manufacturer’s instructions included. This will help you to figure out how to use it.
Good quality professional product
Makartt is a very popular and reputable brand of gel nail polishes and polygels.
They create their products with professionals in mind. So this polygel is a high-quality professional product that has been tried and tested by many nail technicians and consumers, including me.
Long-lasting
This polygel is very sturdy and can last up to 3 weeks with no lifting.
Cons
Stickier than clear polygels from other brands
This polygel is firm and a bit stickier and harder to move around than similar polygels made by other manufacturers.
However, this is easy to fix by dipping your brush into the slip solution more often. Slip solution reduces the stickiness of the material.
If this polygel’s surface stays tacky after you cure it try to use a more powerful lamp.
A 48W lamp is perfect for curing any polygels. It can even cure Makartt polygel in 30-45 seconds!
Requires more slip solution
Since this polygel is quite sticky you will need a bit more slip solution to work with it.
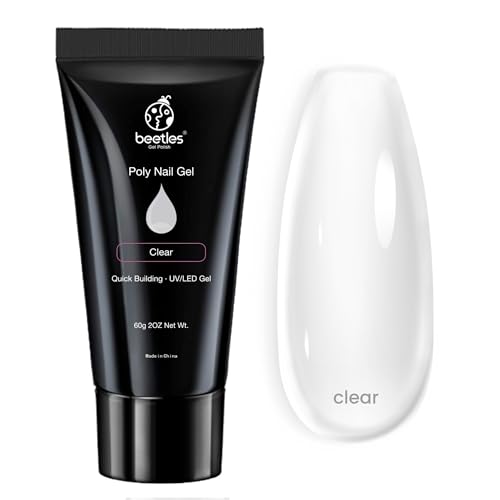
Beetles – easy to use and beginner-friendly
Pros
Clear
This polygel is also very clear and works great for nail art with glitter flakes and encapsulated embellishments.
Easy to work with, beginner-friendly, soft
This polygel is softer than Makartt clear polygel.
So it’s easier to move around and thus it’s a lot more beginner-friendly than products made by Makartt or some other brands.
Even though it’s soft, it’s not overly soft or runny.
Some polygels have a runny consistency, almost similar to that of builder gels, but Beetles one is not like that. It’s firm enough to stay where you put it.
More product
This polygel comes in a larger, 60 ml tube than Makartt polygel, which is available in a 50 ml tube.
So it contains more product for you to use.
Popular
Beetles is a very popular brand of polygels and gel nail polishes.
Thousands of users, myself included, have bought and tested this product.
No smell
The same as Makartt polygel, this product has no unpleasant odor and is great for people who are sensitive to strong smells.
Cons
It may take a bit more time to cure
While Makartt clear polygel hardens very fast, Beetles polygel may take a bit more time to cure, 60-120 seconds.
Slightly grainy
This material has a slightly grainy texture, it’s not completely smooth.
So its particles can be visible even after you smooth it out with the brush.
But this is easy to fix too. I usually cover grainy polygels with a clear top coat or gel nail polish plus top coat to make the surface smoother.
Not as strong as firmer polygels
Softness and ease of movement come at a price. This polygel is a bit easier to break than the firmer one manufactured by Makartt.
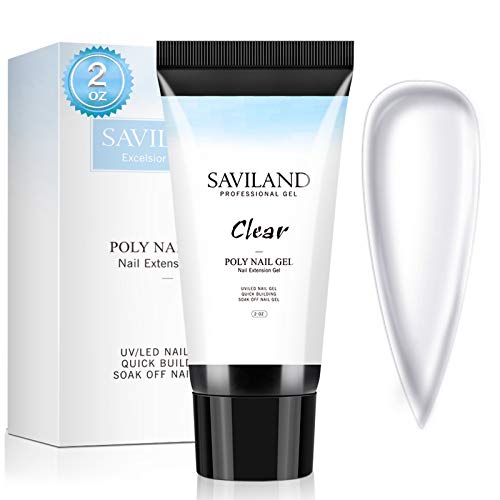
Saviland
Pros
Larger volume
Saviland clear polygel comes in a 60 ml tube, which is 10 ml more than what Makartt and Modelones offer.
The manufacturer promises that this tube can last you for up to a year of making full sets of nail extensions.
Crystal clear
This polygel is also crystal clear.
It has the same level of clarity as Makartt polygel. One of the two clearest polygels on this list.
It’s another product that is perfect for encapsulating nail designs and embellishments.
Long-lasting and very durable
The manufacturer promises a whole month of wear with no chipping or lifting.
I usually wear polygel for no more than 3 weeks in a row and this polygel does last this long on my nails.
This polygel is thick and firm. This makes it strong and durable.
Comes with a user manual and support
This polygel has a set of instructions included.
Plus, Saviland encourages their customers to contact their support if they’re having difficulties with application and wear.
No smell
All polygels are odorless and this one is no exception.
Cons
Thick and difficult to move around
This polygel is very thick. You will even need some effort to squeeze it out of the tube.
Thickness and firmness make it harder to move around.
You may need to use more slip solution with it than with Beetles clear polygel that is softer and more pliable.
Gelish Polygel Nail Kit

Pros
Premium professional product
Gelish is the company that has actually invented polygel and was the first to release it to the market.
Then other brands followed.
It’s a professional premium-grade product that is used by nail technicians in salons.
Comes in a kit that includes everything you need
This clear polygel comes as part of a Trial Kit that lets you try professional products.
The kit also includes a slip solution, a double-sided tool with a polygel picker on one end and a brush on the other end, and a tube key that will help you squeeze out the material from the tube.
However, this is not everything a beginner needs to start doing salon-quality polygel nails at home.
You will also need a UV/LED lamp, a set of forms, dehydrator and primer, base coat, and top coat.
I recommend also getting the excellent Gelish Fantastic Four nail prep kit that includes a dehydrator, base coat, and top coat.
These products will prepare your nails for polygel application and will help your polygel stay on your nails.
Large volume
The tube included in the kit contains 60 g of product.
It’s a large volume packaging. This amount will last you for a long time.
Cures very fast
The manufacturer promises that this polygel can get cured in 30 seconds under their own Gelish 18G lamp.
It’s a 36W lamp.
This polygel indeed cures very quickly.
I have a 48W professional LED lamp and it took me 30 seconds to cure it too.
Super-strong and long-lasting
Since it’s a salon-grade product it’s very strong.
It’s the strongest product on this list.
Most nail techs I know confirm that Gelish Polygel can last for more than 6 weeks and survives all wear and tear!
I never wear a manicure for more than 3 weeks because I like to change colors and designs.
However, this polygel doesn’t lift no matter what I do with my nails.
Very easy to use
This product was made with professional nail technicians in mind.
And pros need to work quickly.
So Gelish Polygel is easy to use, goes on smoothly, and the results look great and professional.
Non-toxic and 7-free
Gelish polygel is safe. It’s non-toxic.
7-free means that it doesn’t contain the 7 most harmful substances, including the Toxic Trio.
No smell
Gelish polygel is also odorless.
As with all polygels, it produces no airborne dust because its filings are heavy and fall straight to the table.
Cons
Not entirely clear
Gelish polygel is named Natural Clear.
It’s not crystal clear but a slightly matte semi-transparent milky-white product.
The best use for it is building nail extensions that you will later coat with a gel nail polish.
Modelones — non-toxic

Pros
Non-toxic
According to Modelones, this polygel is non-toxic.
It’s free from harmful toxins and substances that are bad for the skin and nails.
The manufacturer states that their polygel is also 100% environmentally-friendly.
No smell
As with all polygels, this product is also odorless and releases no toxic fumes into the air.
High-quality and popular
Modelones is another popular and reputable brand that makes professional-grade nail products.
Their gel nail polishes and polygels also have been tried and tested by many people. And I really love this brand too.
Long-lasting
With proper application, this polygel can last up to 21 or even more.
Cons
Runny
Modelones polygel has a pretty runny consistency, especially if you’re working in a warm environment.
This makes it difficult to manage and it may run into the cuticles.
Try to refrigerate it before use.
Sticky
This polygel is also sticky, which makes it hard to move around and requires you to use more slip solution.
It’s not as pliable and beginner-friendly as Beetles clear polygel.
Can come out cloudy
This polygel is not as crystal clear as Makartt polygel.
Sometimes it can come out cloudy.
It’s great for building nail extensions but not so perfect for encapsulation.
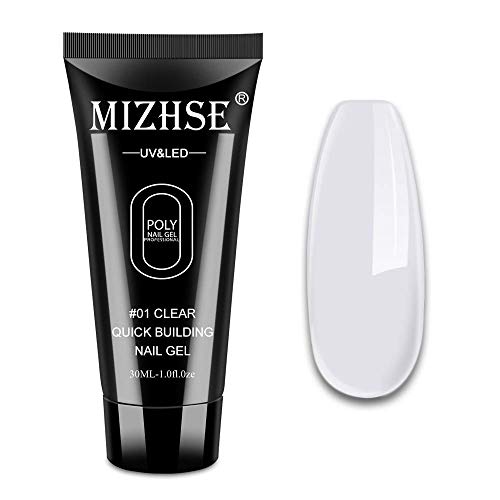
MIZHSE
Pros
Pliable
This polygel is soft and very pliable.
Some people may even find it hard to control but for me, it’s quite easy to use.
Long-lasting
The manufacturer promises about a month of wear.
I’ve found it lasts for at least 3 weeks without lifting. However, I just don’t wear my polygel nail overlay longer than that.
No smell
All polygels are odorless and this one is no exception.
After-sale service
The manufacturer states that they offer after-sale service and support to their customers. You can contact them if you have any problems.
Good quality
Even though there’s not a lot of product in the tube it’s a good quality polygel comparable with professional brands I’ve listed above.
Cons
Smaller tube
This product comes in a smaller tube.
You only get 30 ml of product, which is two times less than what you receive when you buy Rosalind or Beetles clear polygel.
However, this small packaging is great if you want to try out the product without making a long-term commitment.
Slightly matte
It’s not as clear as Makartt or Saviland polygels.
This polygel can come out slightly cloudy/matte.
Sticky and difficult to manage
This polygel is runny and sticky.
It can be difficult to control, especially if you’re a beginner.
Use more slip solution to make it easier to work with.
Rosalind

Pros
Large tube
This product comes in a 60 ml tube. It’s two times as much polygel as what Mizhse has to offer.
No smell
This polygel is odorless too.
Long-lasting
As with most polygels, this one can last up to 3 weeks with proper application.
After-sale service
Rosalind also offers after-sale customer support.
Cons
Takes more time to cure
This product is more difficult to cure than other polygels on this list.
If you’re having this problem you may need a lamp with more power.
A 48W lamp will do. It can dry it completely in 1-2 minutes.
Can you put gel nail polish over clear polygel?
Absolutely! Clear polygel is perfect for creating strong and lightweight nail extensions that you can cover with any gel nail polish color that you like.
In fact, gel nail polish stays longer on polygel nails than when you apply it directly over your natural nail plate.
You don’t need to use a gel base coat over polygel nails, only under the polygel extensions on your bare nail plate.
After you have created your clear polygel nails and cured them under the lamp, cover them with 2-3 layers of gel nail polish and with a glossy or matte gel top coat.
You can also use clear polygel as an overlay on natural nails to reinforce and smooth out the nail plate under gel nail polish.
Can I use regular nail polish over clear polygel nails?
Yes, you can use regular polish over polygel nail extensions or nail overlay too.
I’d suggest using regular polish if you like to change the color of your nails often because regular polish is easier to remove and repaint.
How to remove gel nail polish off clear polygel nails?
It’s a lot easier to remove gel nail polish from polygel nails than from acrylic nails.
You can soak gel polish off without ruining the nails.
Polygel doesn’t get soaked off with acetone. So the polish will go away and the clear nail extensions will stay untouched and transparent.
Clear polygel encapsulation tips
Encapsulating glitter and sequins in polygel using dual forms is super-easy.
This video shows how to do it even using press-on nails as dual forms if you don’t have real forms on hand.
Here are the steps you need to follow to make great polygel nails with encapsulation that will stay and look like glass.
- Prep your nails with a dehydrator and primer.
- Apply a layer of gel base coat, cure it under the lamp for 30-60 seconds.
- Spread a thin layer of clear polygel over a dual form.
- Before curing this layer, while it’s still sticky, use a nail diamond picker to pick up pieces of chunky glitter, foil, or sequins and arrange them over the layer of polygel as you like.
- Cure that layer of polygel together with dual form under a UV lamp for 60-90 seconds without sticking it to your nails.
- Spread another layer of polygel over the dual form.
- Apply the form with the material to your natural nails and press it in place.
- Cure the nail with the form under the lamp for 60-90 seconds or more if needed.
- Gently pull the form away.
- File the polygel nail to perfection.
- Apply a layer of glossy gel top coat for a nice finish. Cure it under the lamp for 60-90 seconds too. If your too coat is a no-wipe one, you’re done. If it stays sticky wipe off the tackiness with Isopropyl Alcohol. That’s it!
It usually takes an hour or even less for a full set of nails with encapsulation using clear polygel and dual forms. It’s that easy!
Recommended reading:
Best Polygel Nail Kit Reviews And How To Apply Polygel At Home
Is Polygel Bad For Your Nails? 9 Reasons Why It’s Safe
Best Glitter Polygel Nail Kits
Best And Safest Neon Polygel Nail Kits
Best Polygel Dual Forms For Perfect Nail Extensions
Overlay Nails 101: Acrylic And Gel Nail Overlay On Natural Nails – The Ultimate Guide
Best Professional Gel Nail Polish Brands Used In Salons
Non-Toxic Gel Nail Polish Brands 101: Choose The Safest Gel Nail Polish
Best No Light Gel Polish — Gel Nail Polish Without UV Light
Best Gel Base And Top Coat: The Updated List Of The Best Gel Nail Base And Top Coat Sets
Best Small Salon Reception Desk For A Tight Space: Make An Amazing First Impression!